Documenation
Let Us Know How We Can Assist You.
Genaral
Installation
Admin Dashboard
Introduction
Welcome To Surveytickmark
SurveyTickMark is a comprehensive tool for creating surveys, forms, and quizzes with two primary options: a simple Yes/No survey mode, and an advanced form builder for more complex data collection. This documentation will guide you through using the platform effectively, whether you’re creating basic feedback surveys or intricate forms with conditional logic.
We would like to thank you for purchasing Surveytickmark Admin + Website
We are very pleased that you have chosen Surveytickmark for your survey website, you will be never disappointed!
Before you get started, please be sure to always check out this documentation. We outline all kinds of good information, and provide you with all the details you need to use Surveytickmark.
If you are unable to find your answer here in our documentation, we encourage you to contact us with your site CPanel or FTP details. We’re very happy to help you and you will get reply from us more faster than you expected.
Thank you, we hope you to enjoy using Surveytickmark!
Package Included
1. Source Code Of Website (Admin + Website)
Installation
Requirement for admin panel and website
You need to meet the following requirements:
- PHP 7.0 or higher
- MySQL 5 or higher
Recommended PHP Configuration Limits
Many issues are related to low PHP configuration limits. To resolve this, you can increase the PHP limits on your own or contact your web host to do so. The minimum recommended limits are:
- max_execution_time 600
- memory_limit 215M
- post_max_size 64M
- upload_max_filesize 64M
- max_input_vars 5000
Manual installation
To manually install Surveytickmark, follow these four steps:
1. Create a folder with your desired name inside your local server (e.g., htdocs for XAMPP or www for WAMP). Then, unzip the package and copy all files and folders from the “upload” folder into the created folder.
2. Create a MySQL database and import “surveytickamrk.sql” from the unzipped package. Follow these steps:
- Under Databases , enter database name(as you want) and click on create button.
- Select the newly created database from the left panel.
- Click on “Import” in the top menu.
- Click “Browse” under “File to Import” and select “surveytickmark.sql” from the unzipped package.
- Click “Go” to import the database file.
- When the database has been successfully imported, a message similar to “Import has been successfully finished, ## queries executed” will appear at the top of the page.
3. Open the application/config/config.php file with a text editor and set your base URL.
4. Open the database.php file from root with a text editor and setup your database settings.
Installation via FTP client
To install Surveytickmark server via FTP, follow these four steps:
1. Unzip the package and locate the “upload” folder
2. Connect to your FTP server and upload all files from the “upload” folder to “public_html”.
3. Create a database(Click here for how to create) and import “surveytickmark.sql” from unzipped package. Follow below steps to import database:
- Select the database you created from the left panel.
- Click “Import” in the top menu.
- Click “Browse” under “File to Import” and select “surveytickmark.sql” from the unzipped package.
- Click “Go” to import the database file.
- When the database has been successfully imported, a message similar to “Import has been successfully finished, ## queries executed” will appear at the top of the page.
4. Open the “application/config/config.php” file of server files with a text editor, set your base URL, and save & upload again.
5. Open the “database.php” file of the server from the root with a text editor, set up your database settings, and save & upload again.
Admin Dashboard
Admin Login
After successful installation, you can access the admin panel using the following link:
- Admin panel: http://localhost/xyz/admin2020 (replace “xyz” with your project folder name) or http://xyz.com (replace “xyz.com” with your domain name)
Please note that after your first login, you must change the default password to a strong password of your own choice.
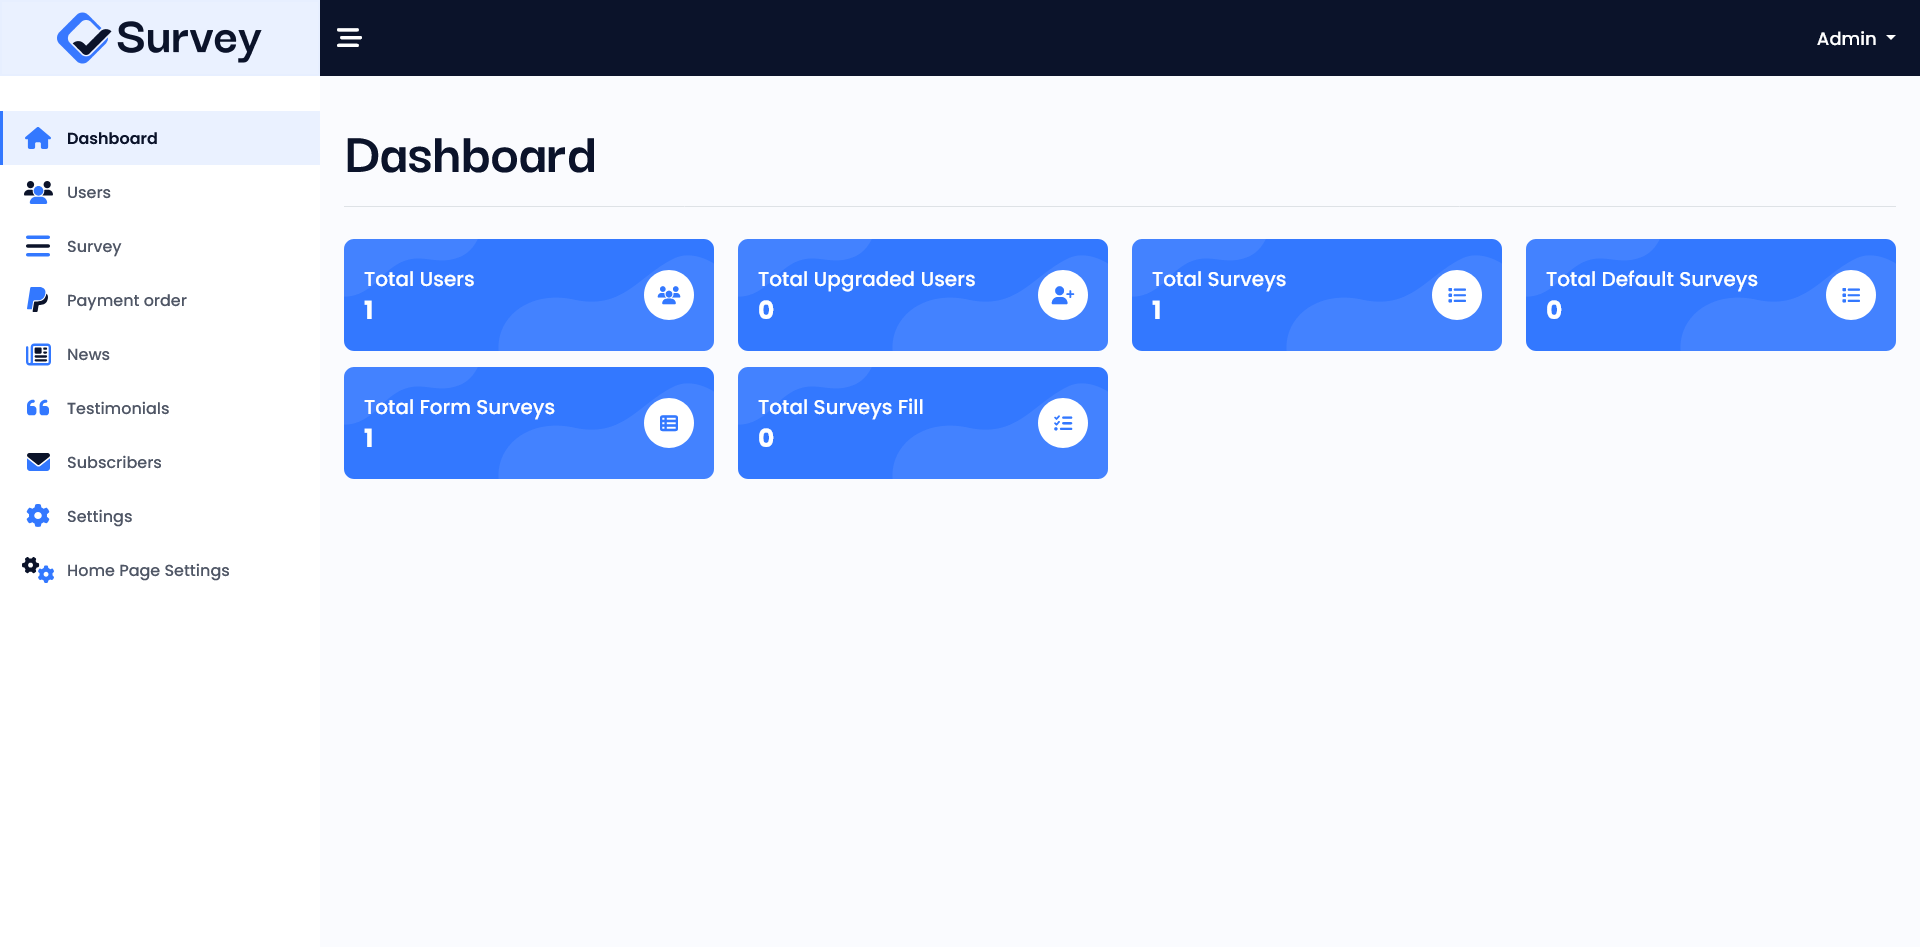
Dashboard
Overview of key metrics, surveys, users, upgraded users and responses.
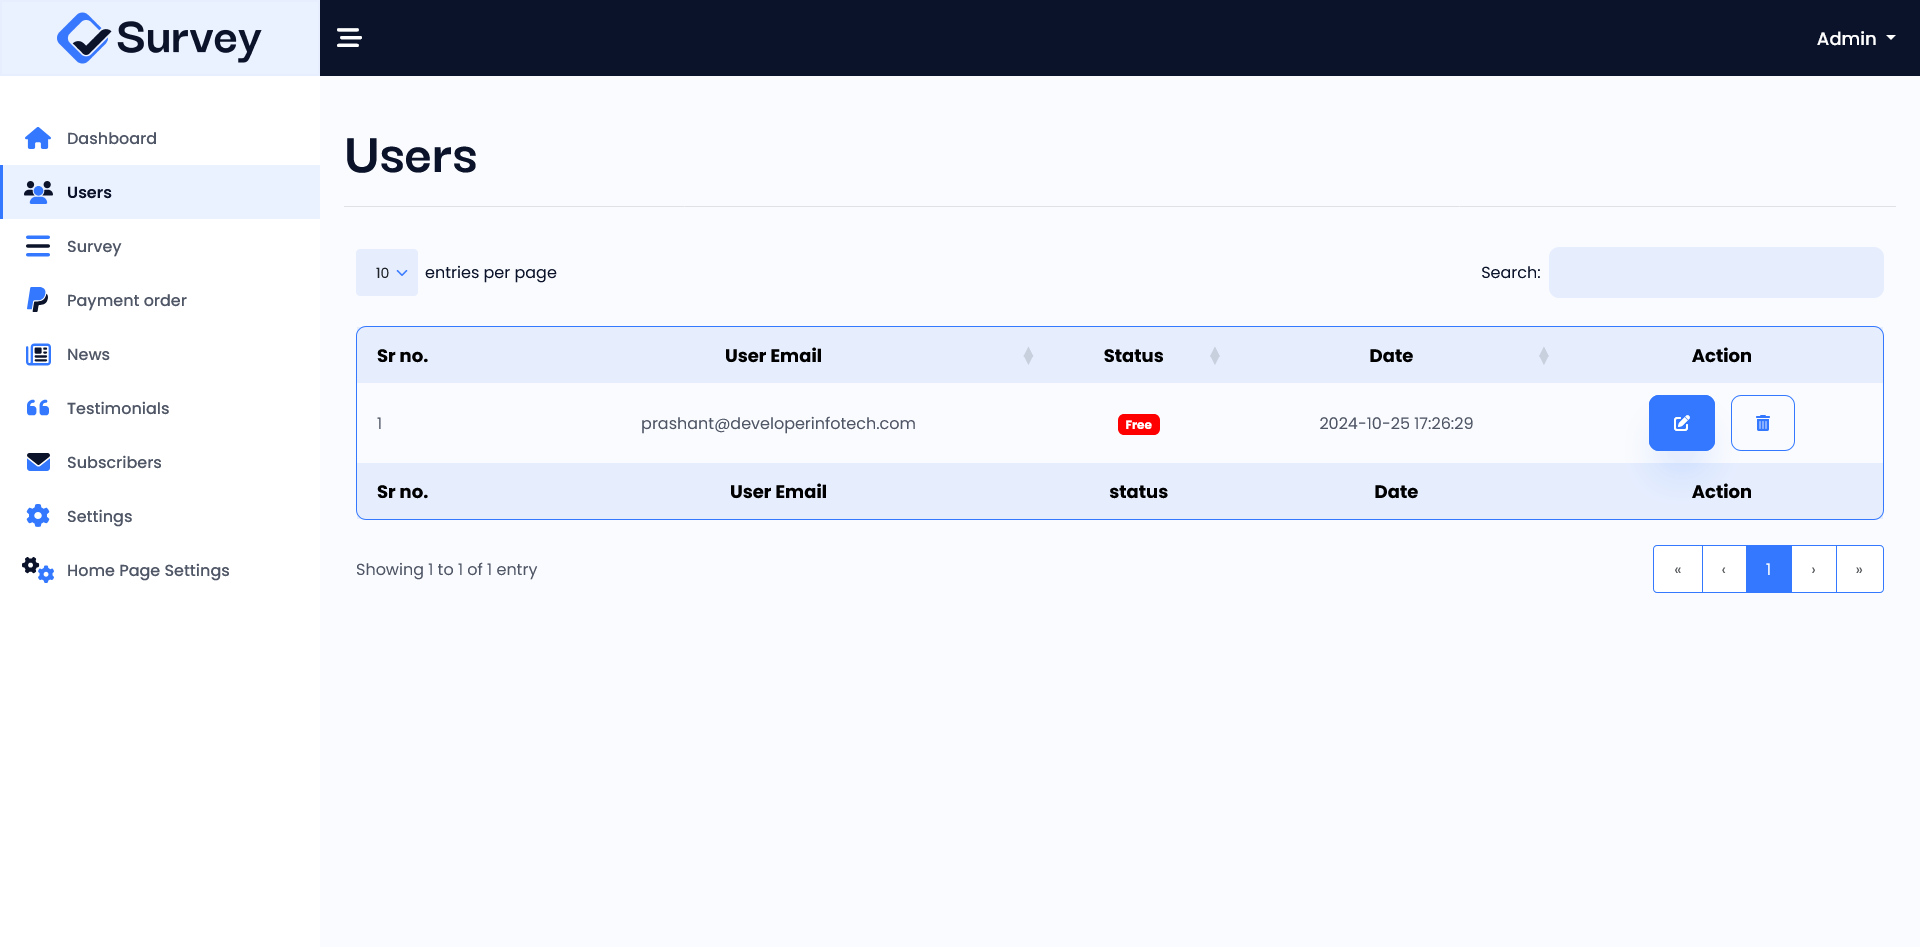
User Management
You can manage your registered users. You can update user information, delete users, and activate or deactivate users.
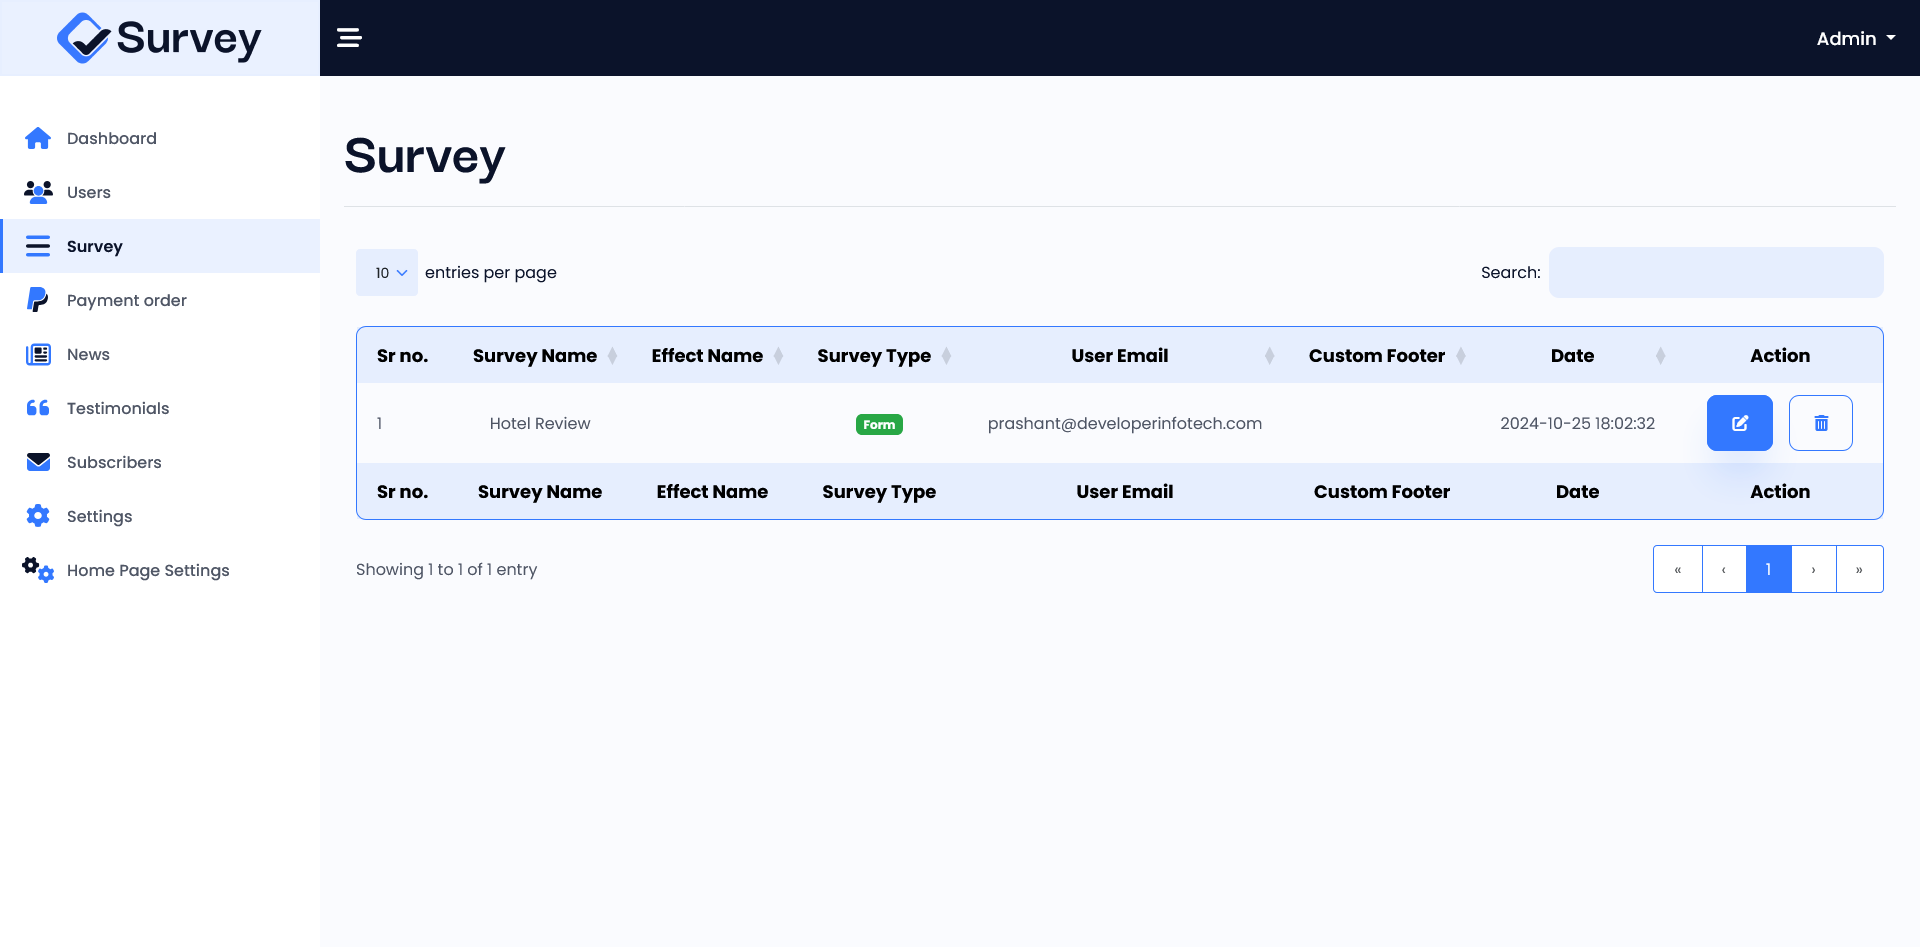
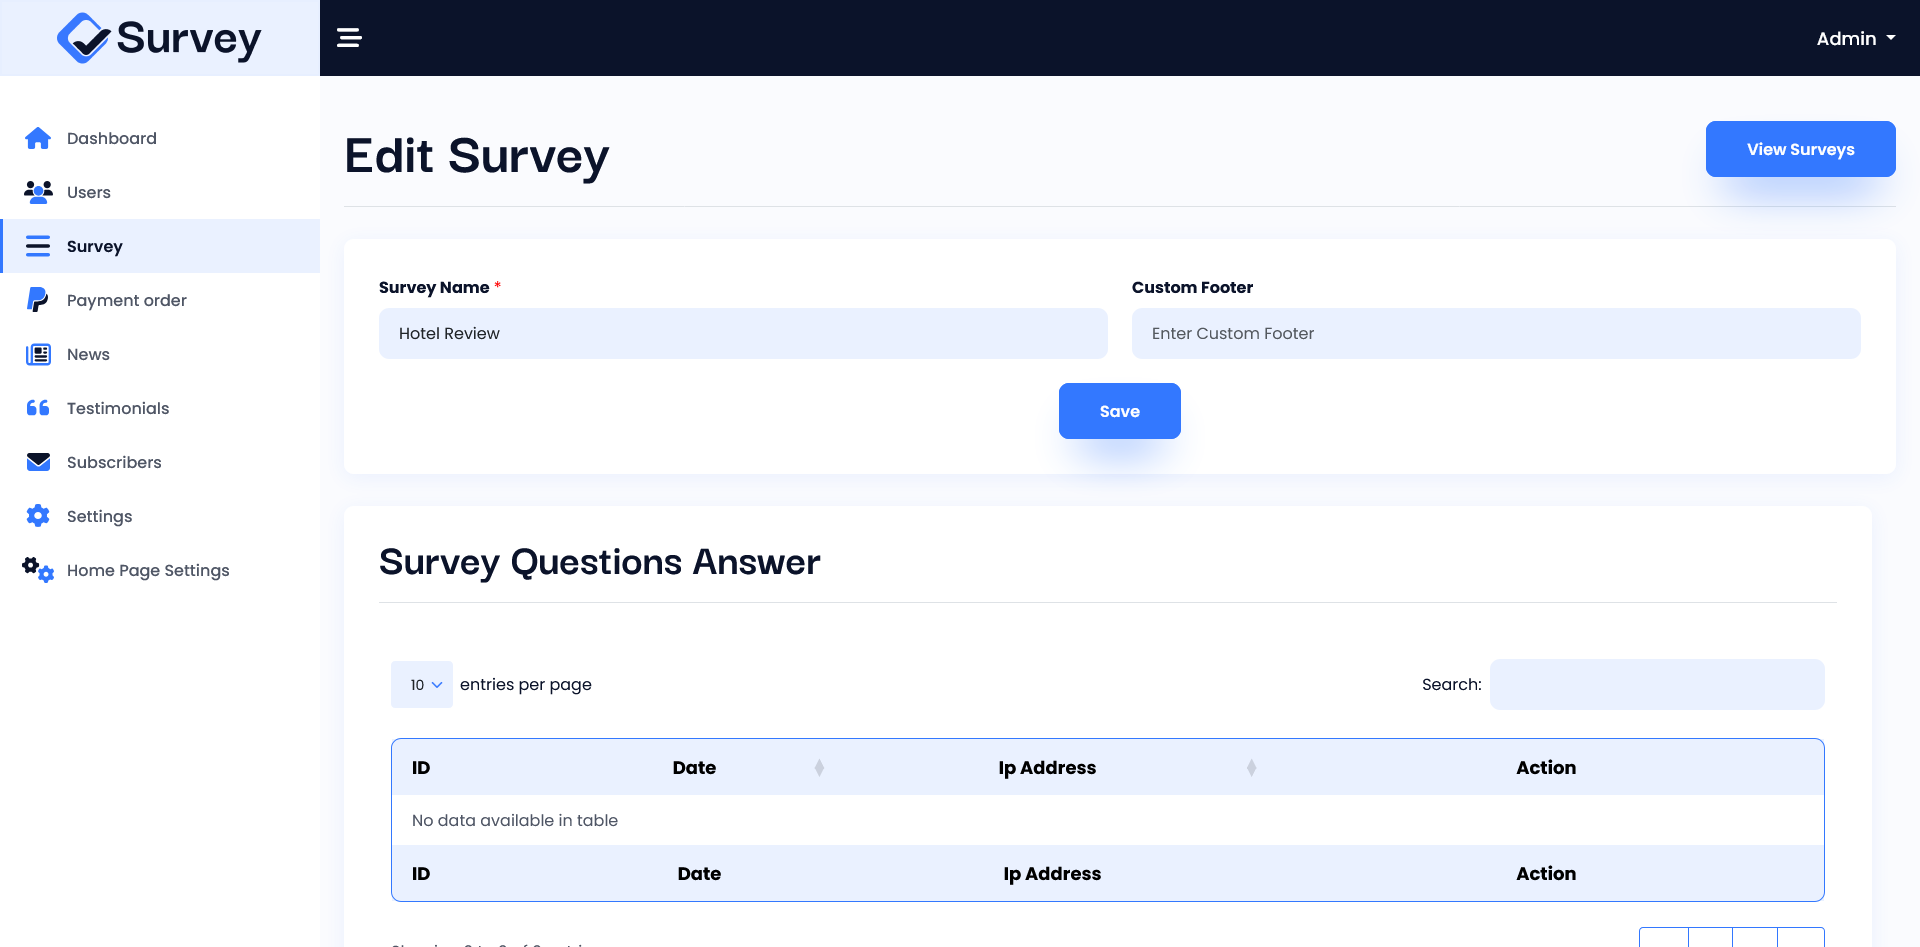
Survey Management
You can use this section to manage the surveys of your registered users. You have the ability to update survey information such as name, footer text, and survey effects. You can also check the survey results. In the simple Yes/No survey mode, you can manage survey questions, and edit or delete them. Additionally, you can delete surveys and activate or deactivate them from survey list.
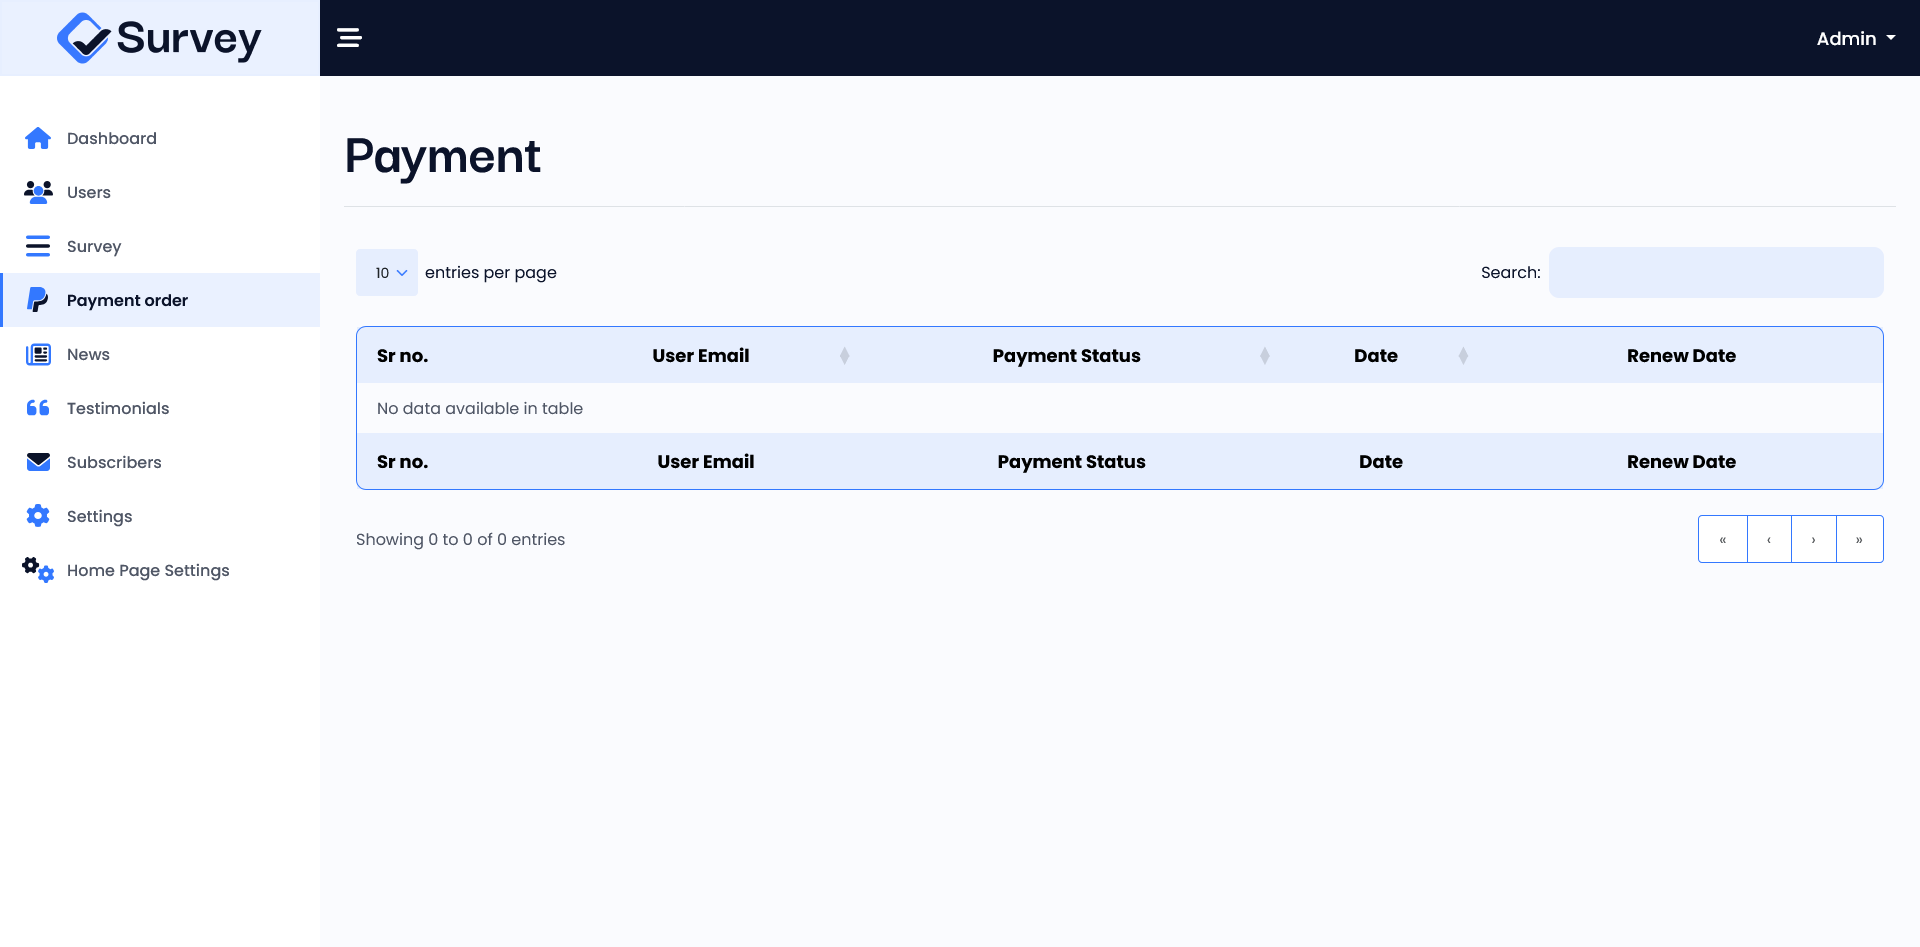
Payment List
You can review the payment orders of your upgraded users in payment list.
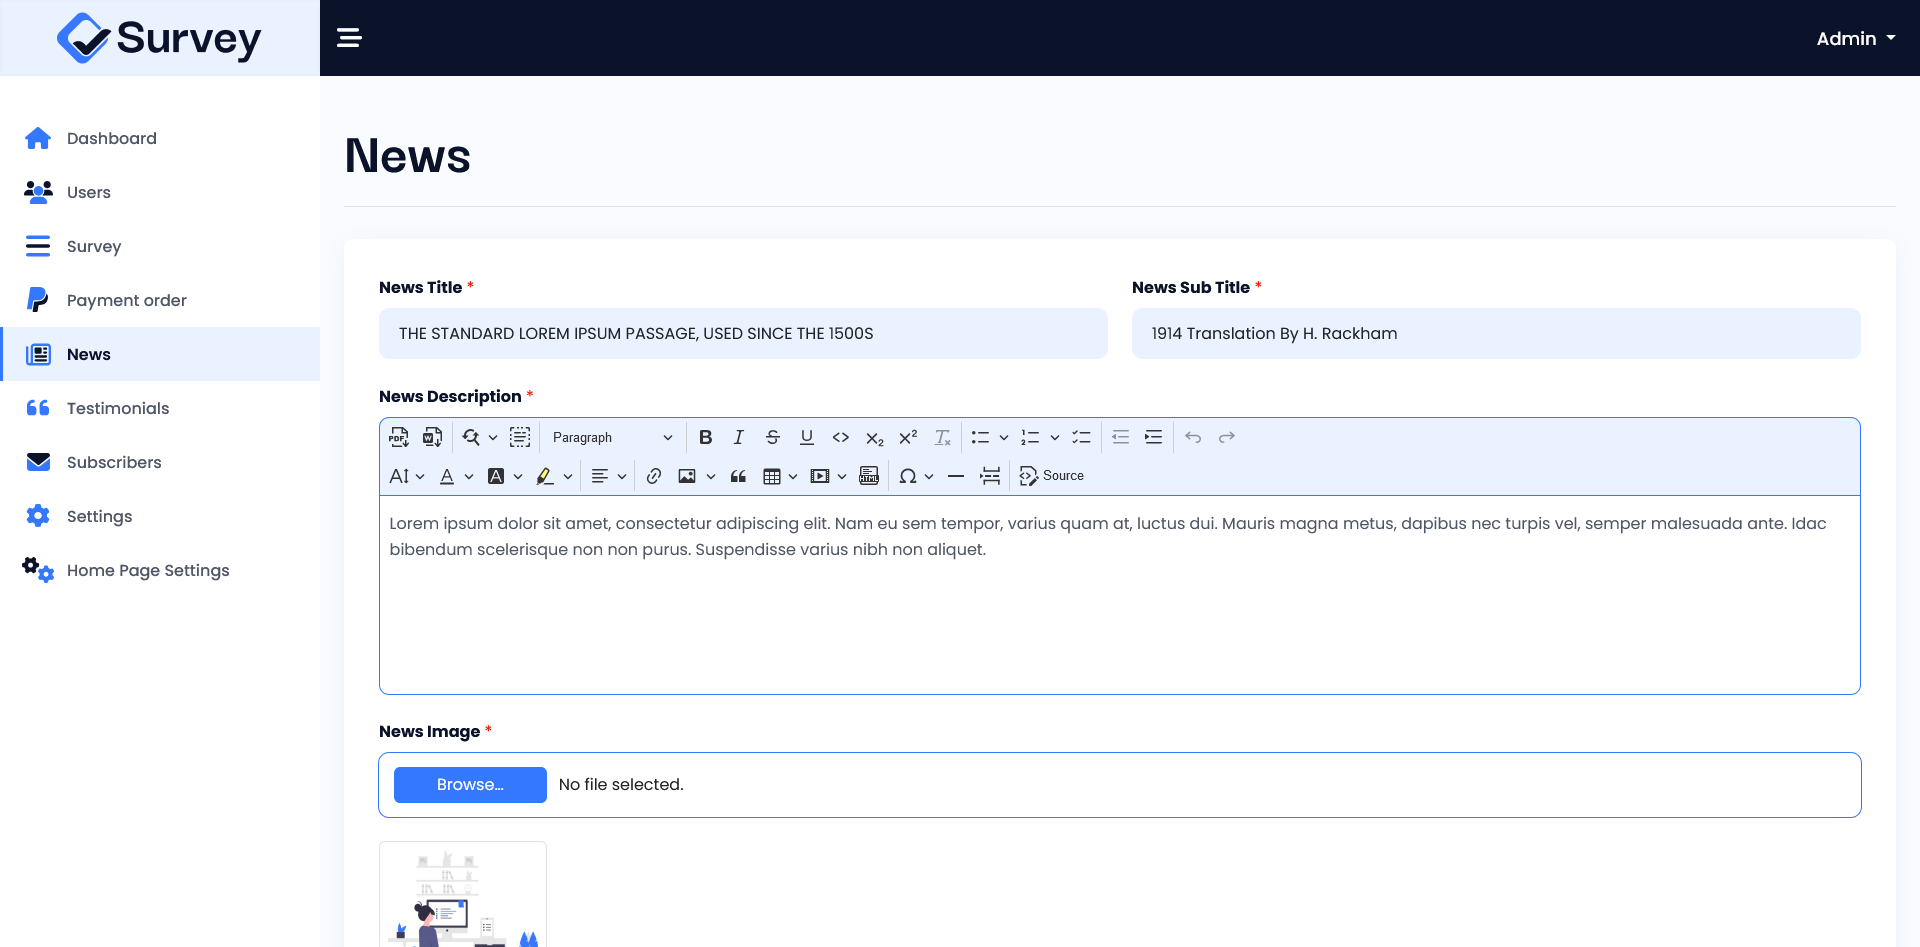
News Management
You can edit the latest news that appears in the news section on your website.
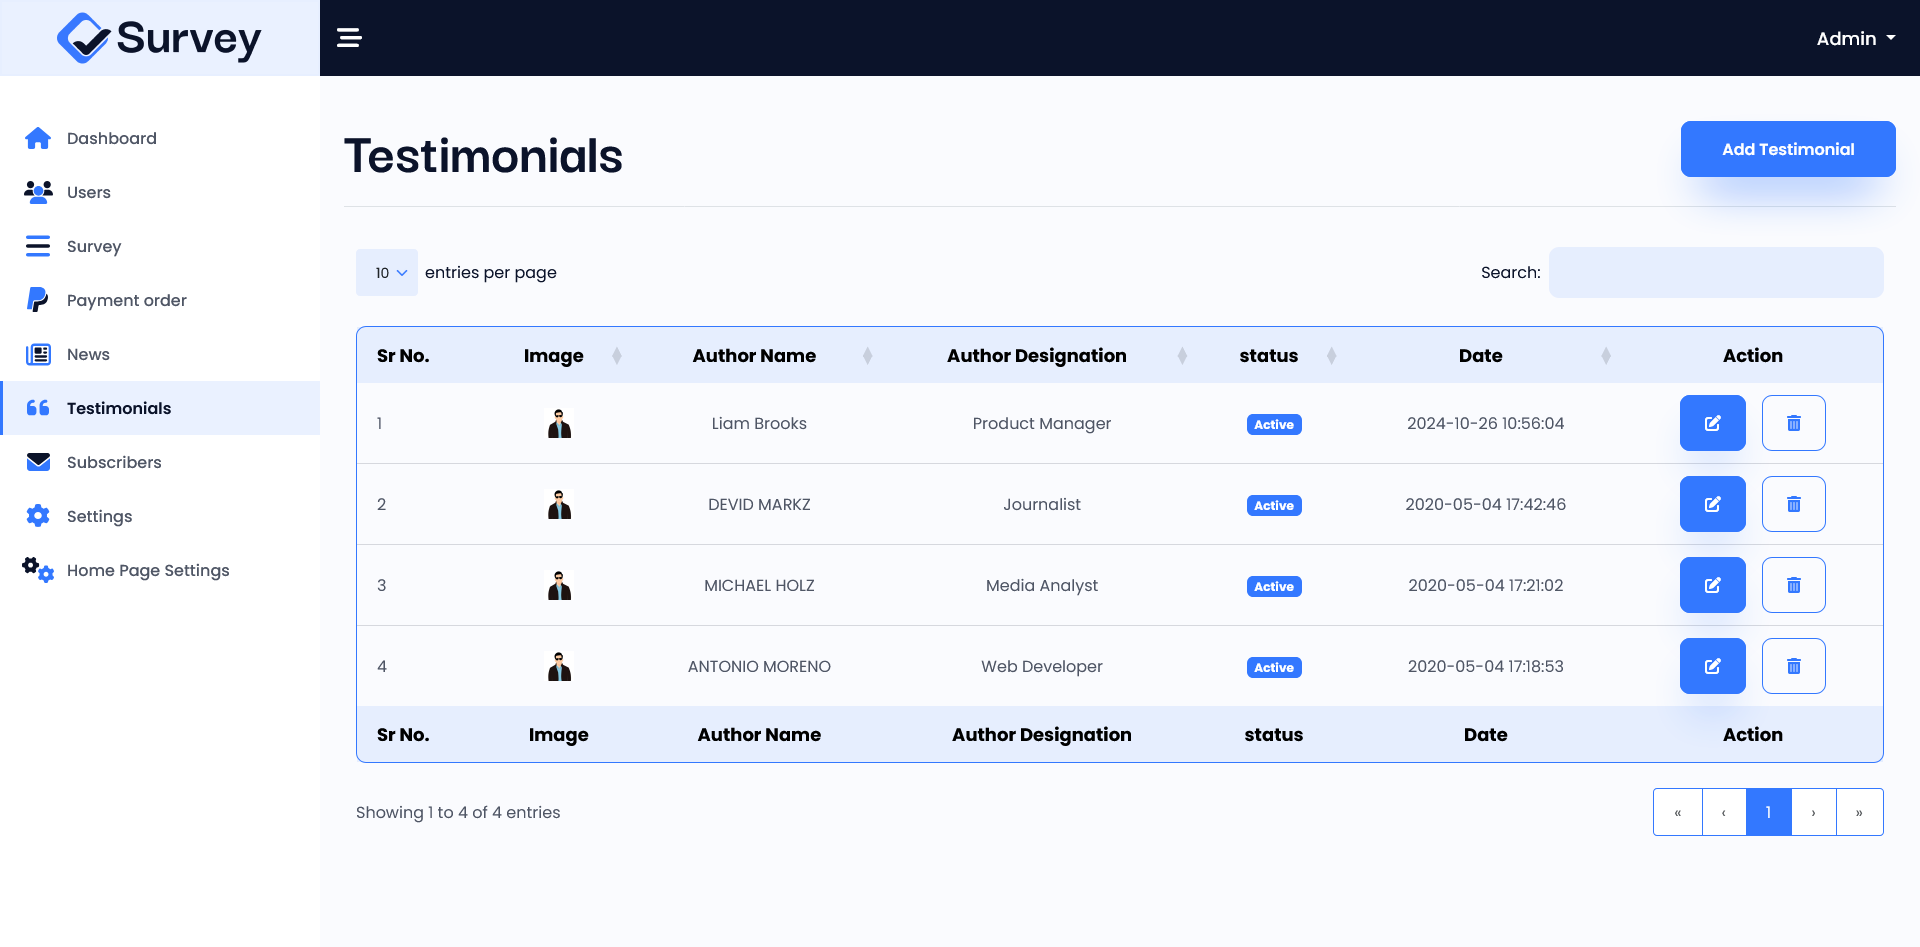
Testimonial Management
You can use this section to manage the testimonial that appears in the testimonial section on your website. You have the ability to add, update & delete testimonial. Additionally, you can activate or deactivate them from testimonial list.

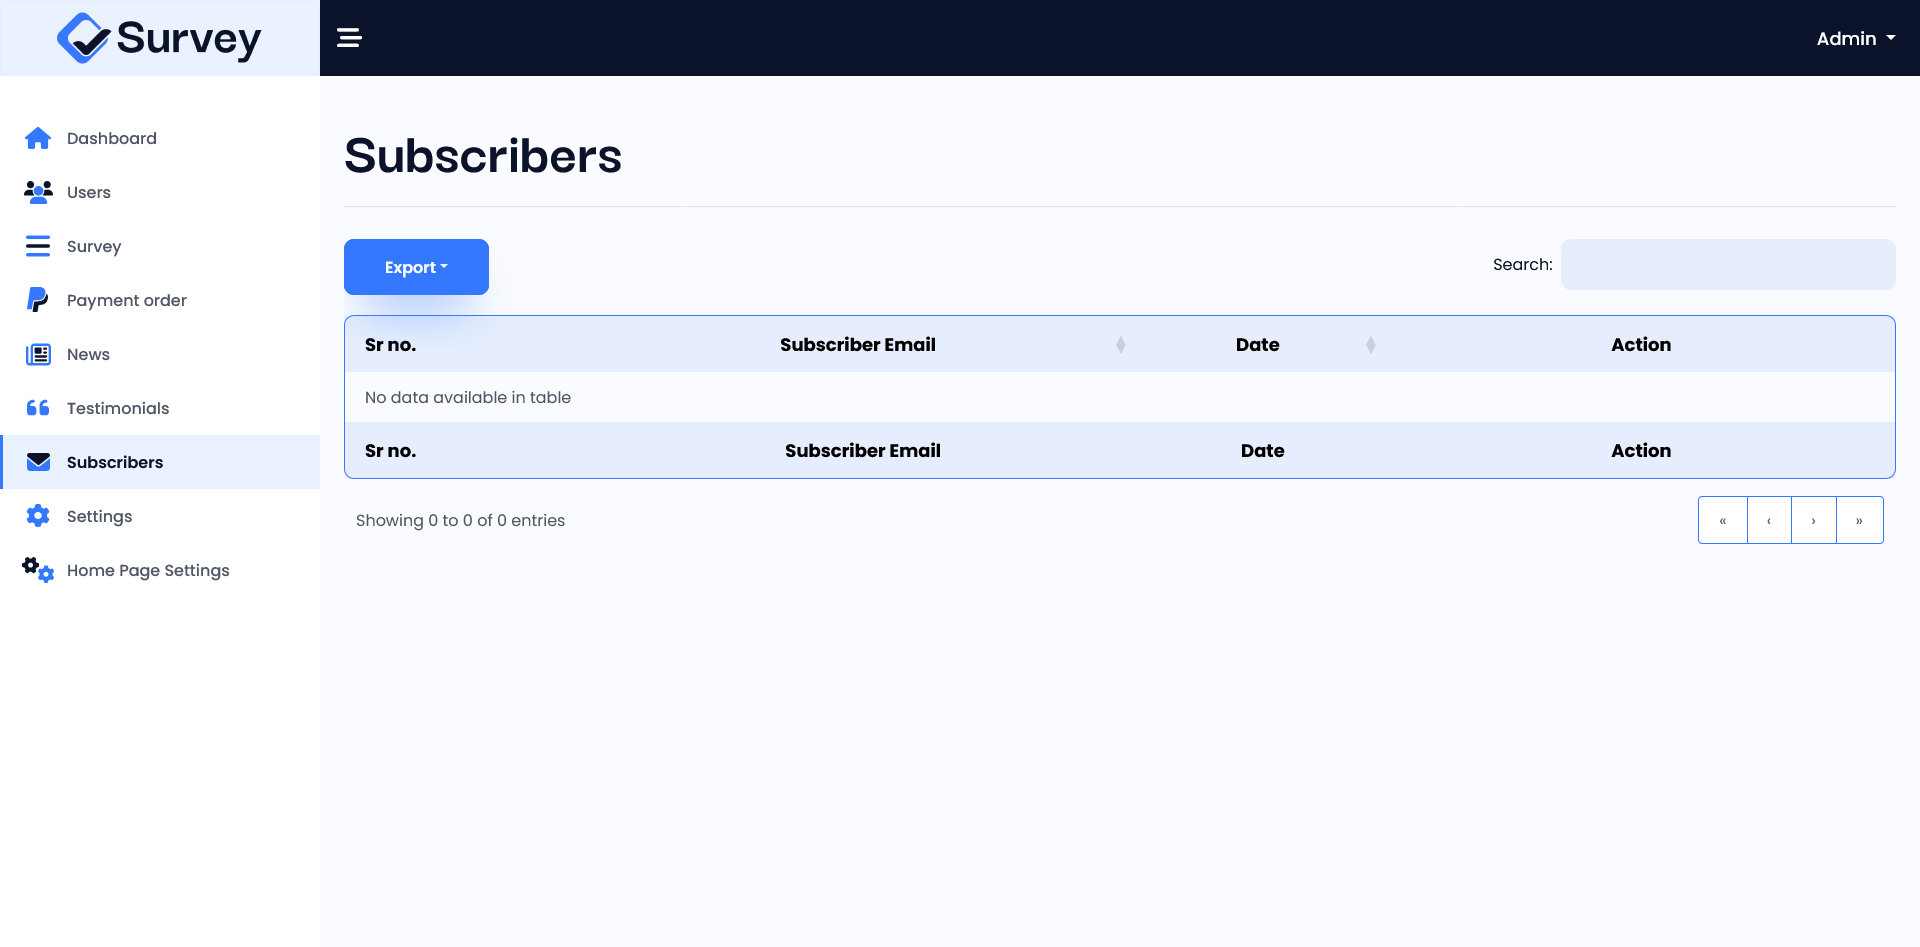
Subscribers List
You can review the subscribers list. You have to ability to export subscriber list in CSV & PDF format. Also you can delete subscriber form list.
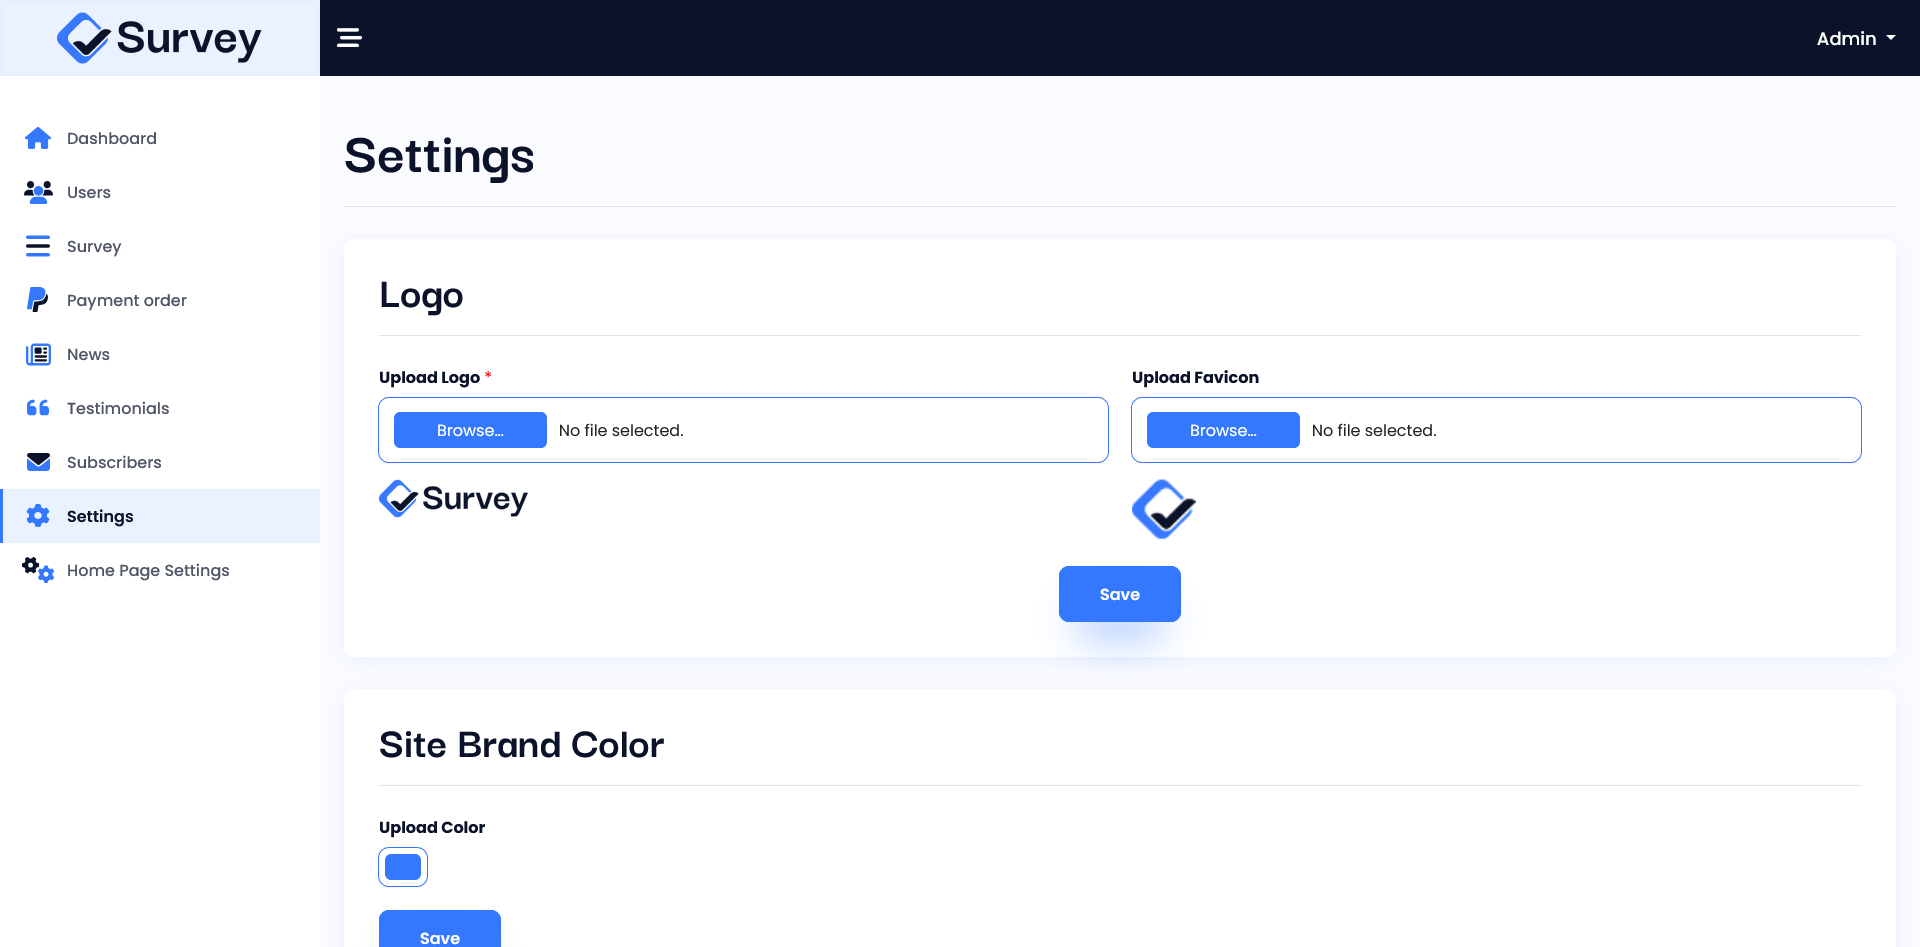
Settings
You can set the logo, favicon, company details, PayPal settings, edit pricing structure, contact details, and social settings.
- Logo Setting – Set Logo & Favicon of your site.
- Company Details – Set your company name, company email, copyright text. Also you can set either author name will show or not on site.
- PayPal Settings – Integrate PayPal gateway, set payment mode, and enter the merchant email.
- Pricing Structure – Set your pricing plan detailed like title, subtitle, plan featured list and price.
- Contact Details – Set contact email and phone no of your company or site.
- Social Settings – Set your project social media links.
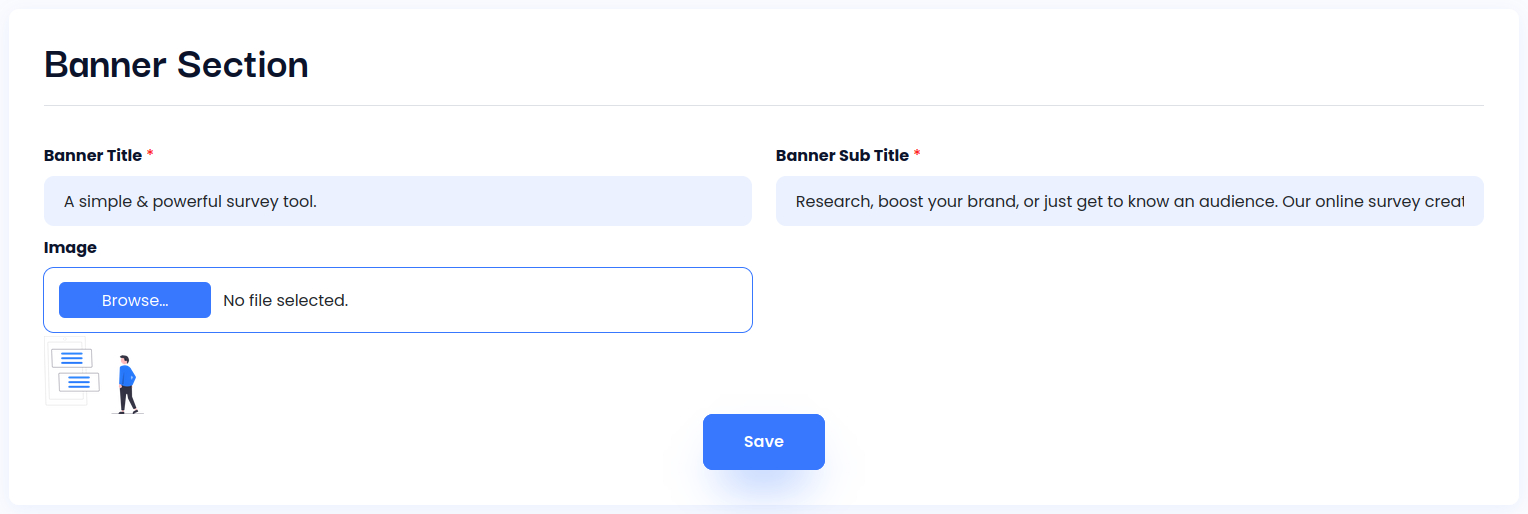
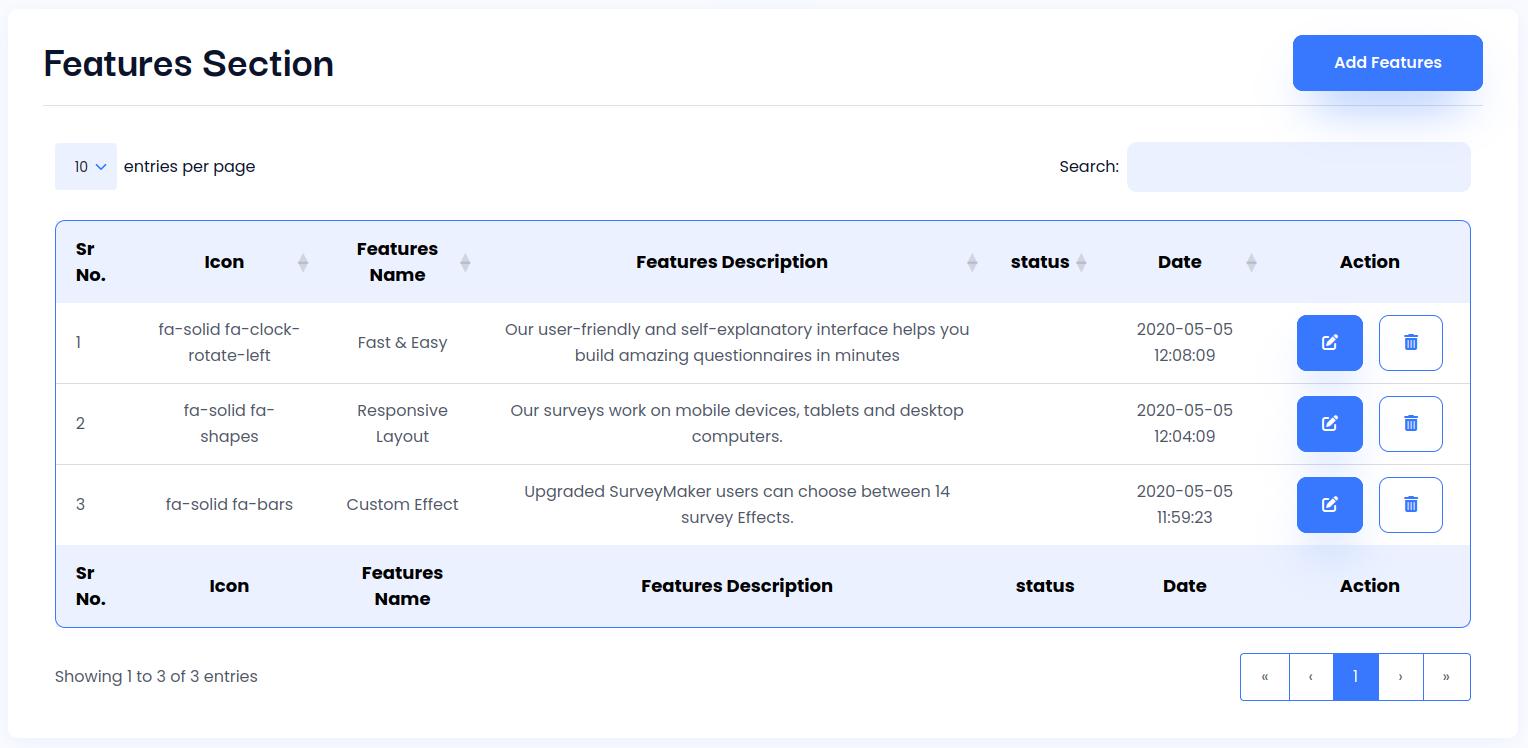
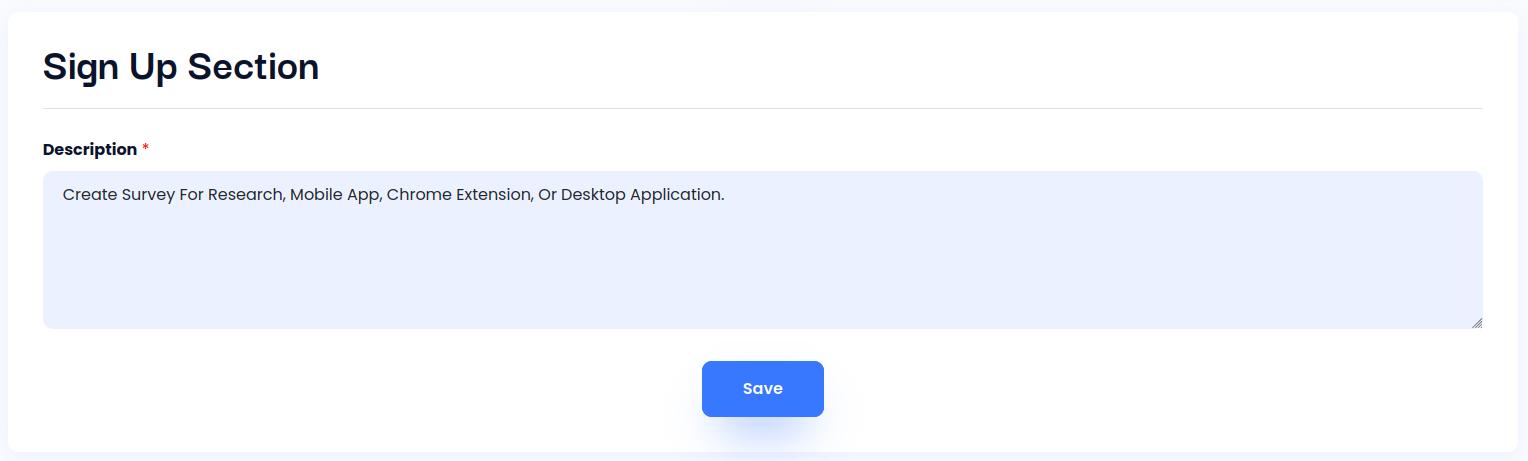
Home page Settings
You can manage the details of your project’s homepage in the homepage settings, such as banner information, feature information, how it works, and the signup section title.
1. Banner information
2. Feature information
3. How it work information
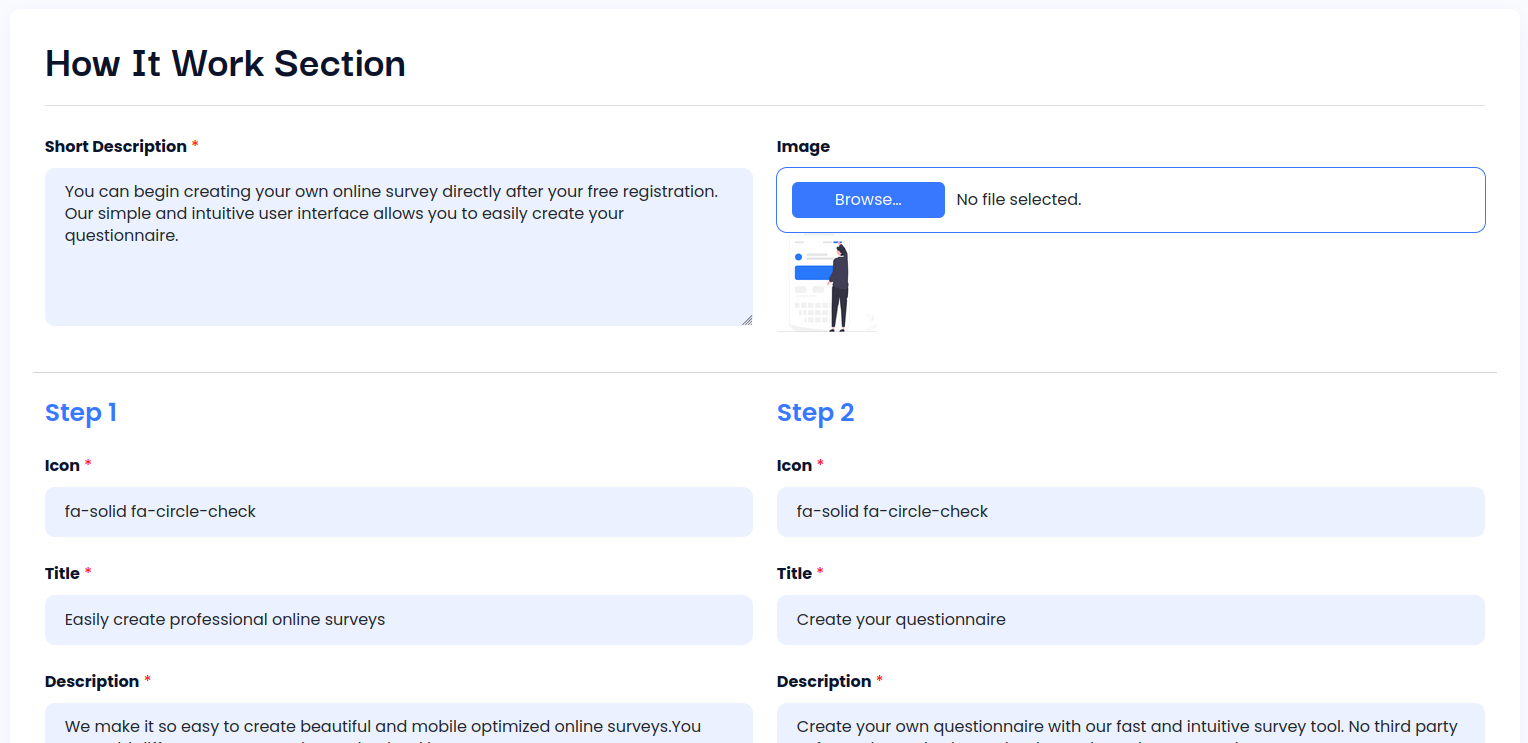
4. Signup information
Website Management
Upgrade Account
Users are initially active with a free account that has limited access. To upgrade the account, follow these steps:
- Go to “My Account.”
- In the header, you will find an “Upgrade Account” button.
- Clicking on the button will prompt a pricing popup.
- From there, users can upgrade their account.
- After successfully making the payment with a PayPal account, the user’s account will be upgraded automatically every month with the same amount.
Creating Yes/No Surveys
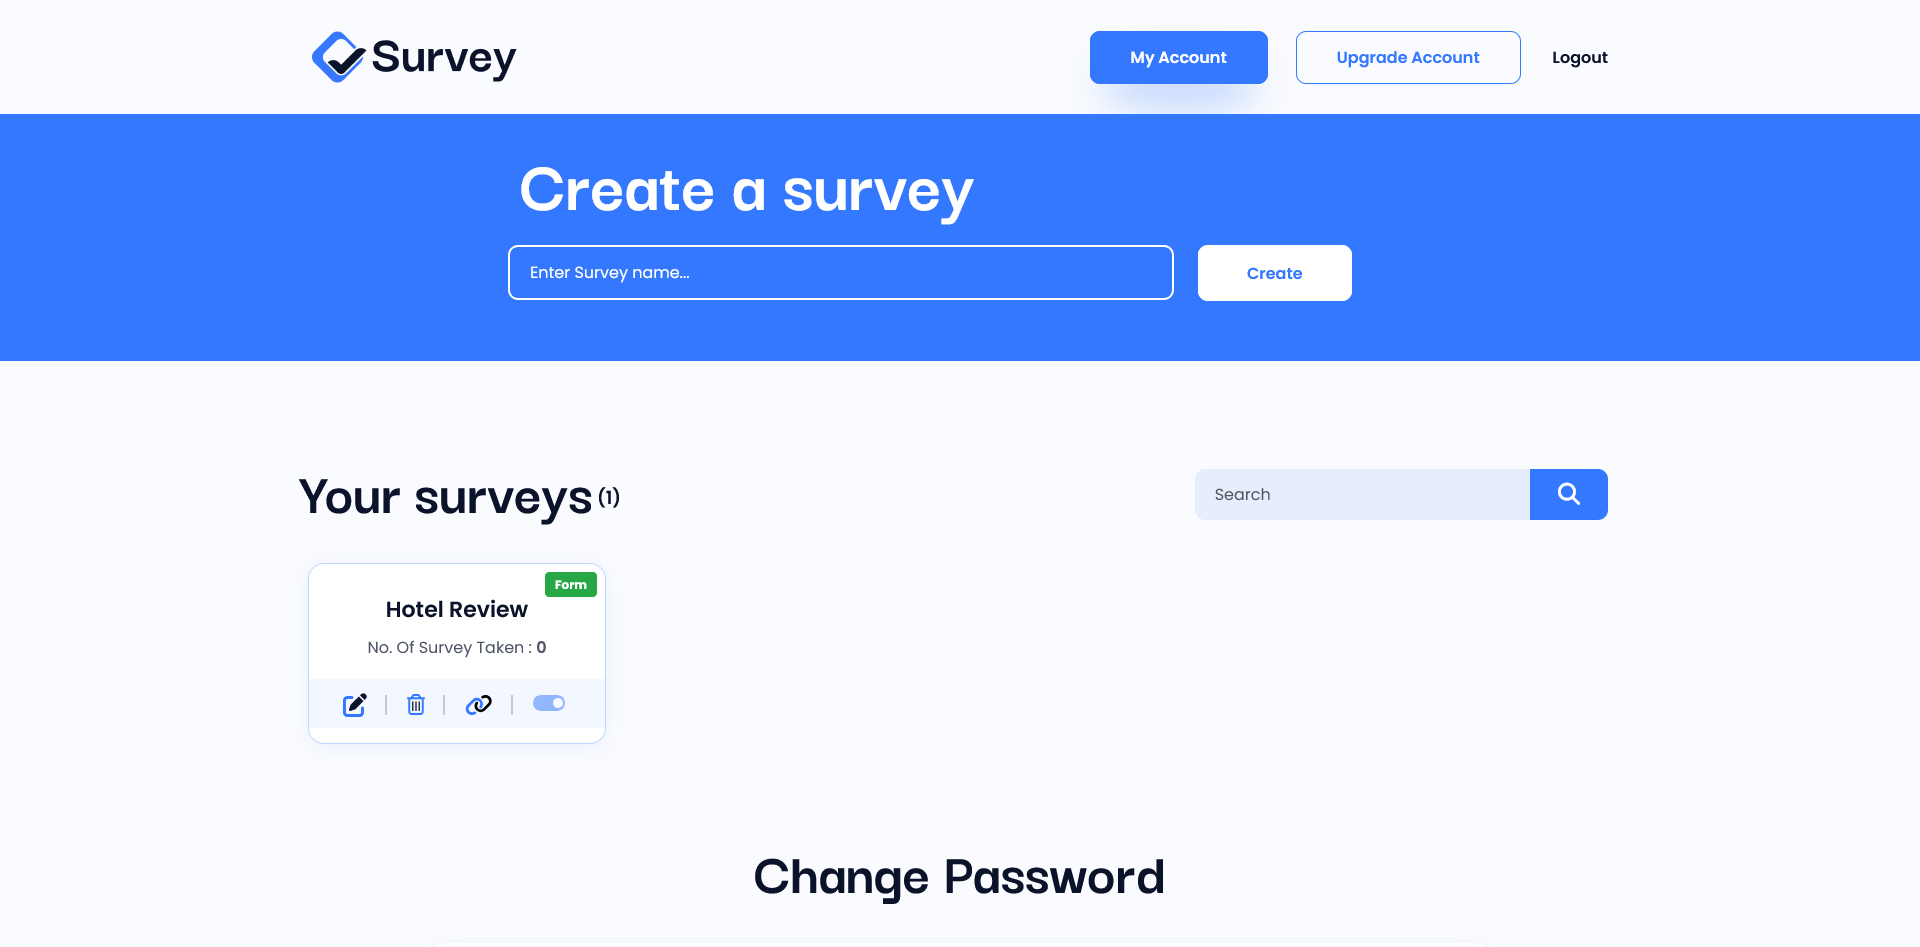
Step 1:
- Navigate to “My Account.”
- Enter the survey name you wish to create and click the “Create” button.
- Clicking the button will create the survey and add it to the list of surveys below.
- In the survey list, locate your survey and edit it.
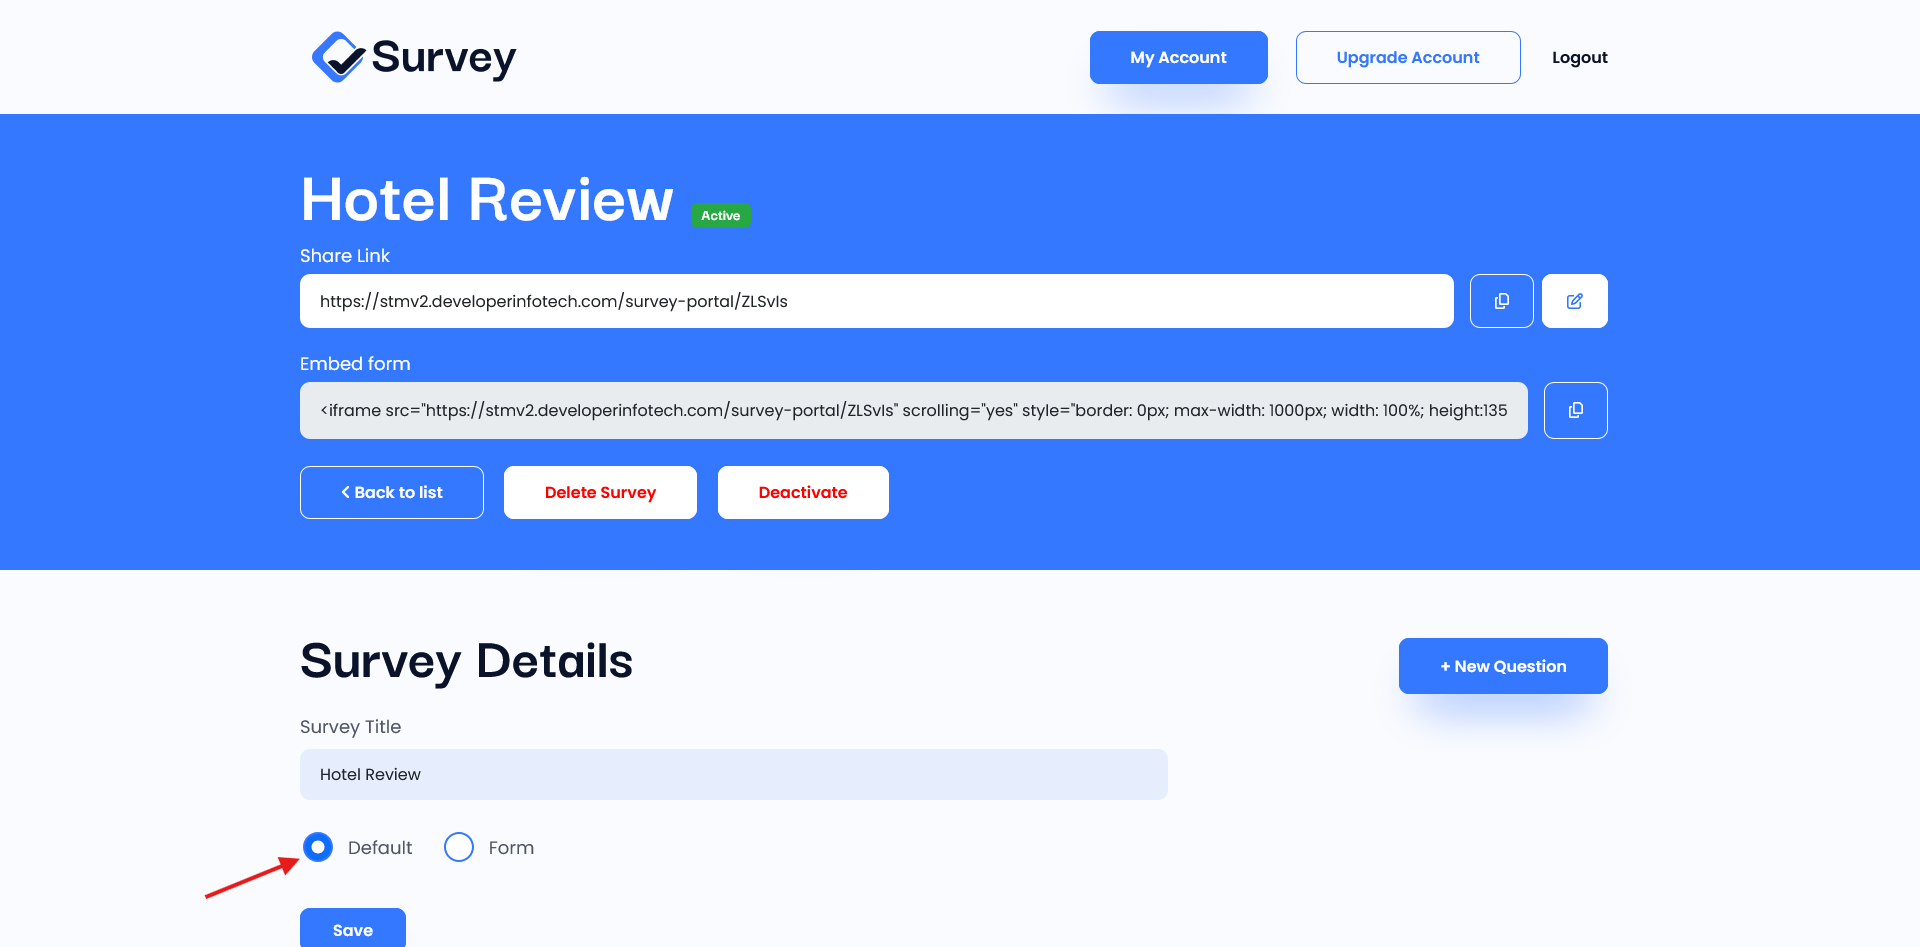
Step 2:
By default, when you create a survey, it will be assigned the “yes/no” survey type. If the type is not assigned, you can select the default survey type, which is for yes/no surveys, or you can choose the form type for advanced survey building. Remember to select the type and save it.
Step 3:
Clicking on “New Question” will scroll down to the “Add Question” section, where you can add, update, and delete questions.

Step 4:
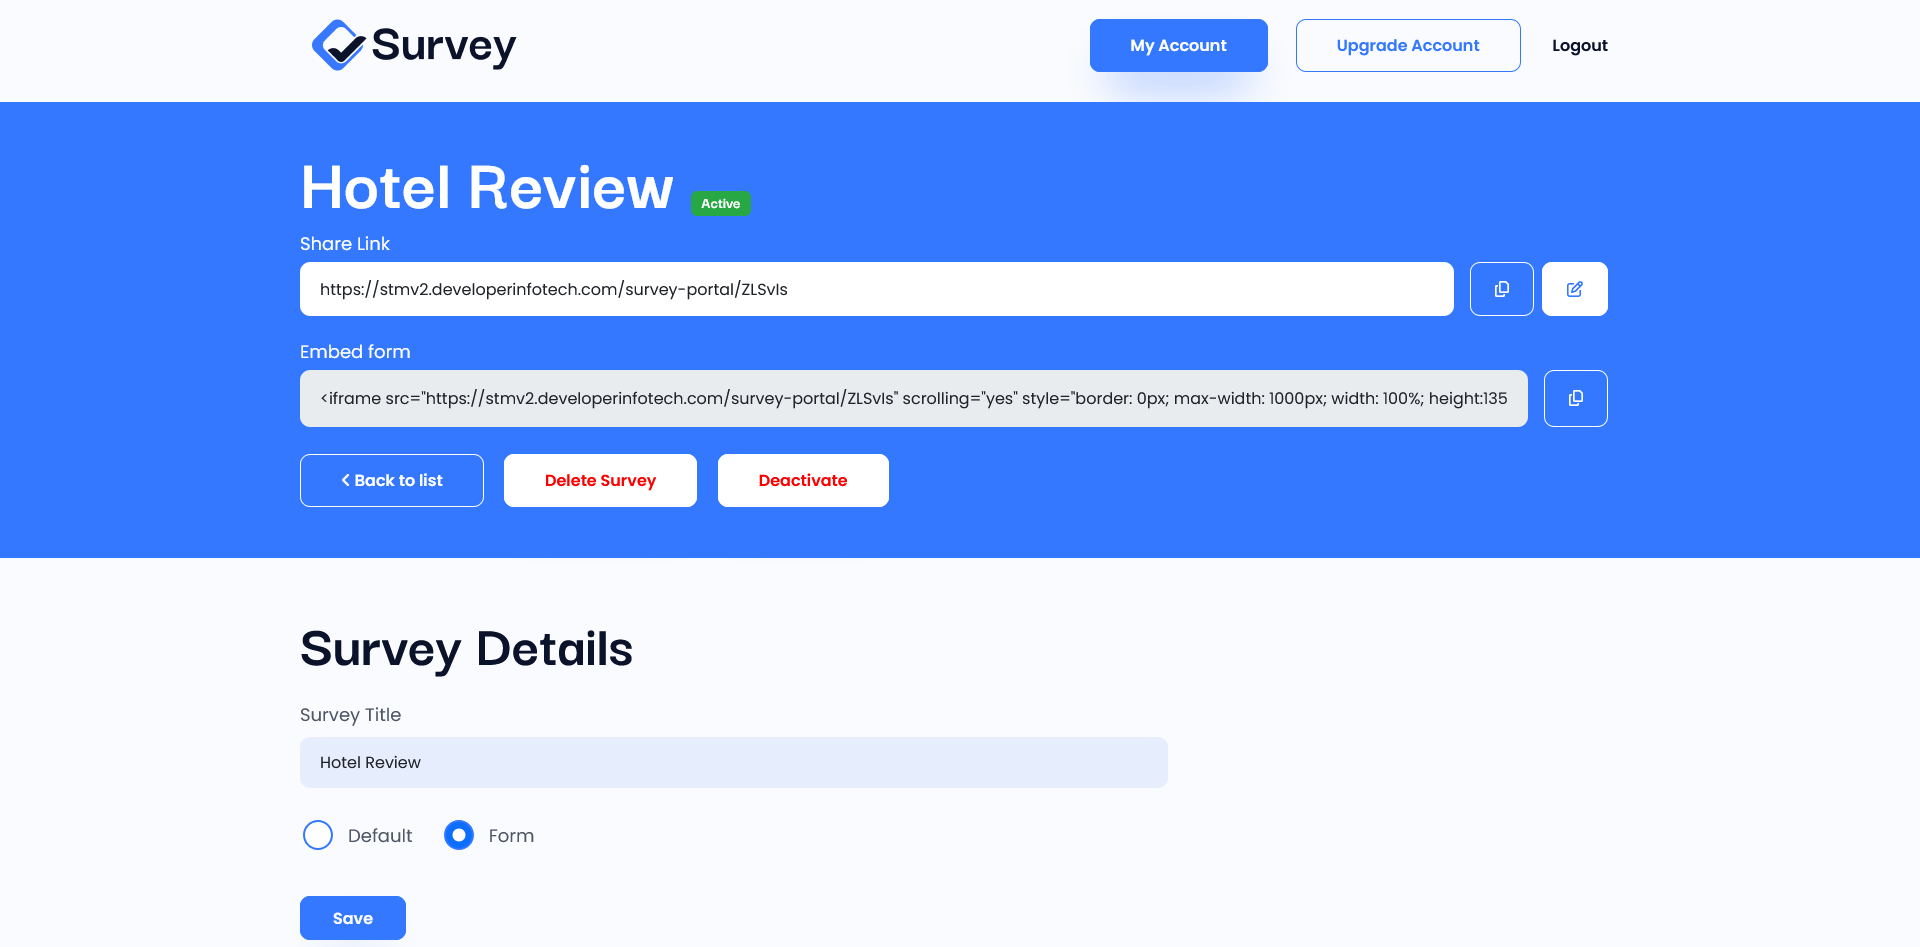
Activate the survey form in the top section. You can also obtain a shareable link and embedded code for sharing. The embedded code can be used to add the survey to any site.
How to change Yes/No Survey Effect?
There are 14 types of “Yes/No” surveys available. You can use any type of effect for your survey. Edit survey, there is “Edit Effect” section after the “Question List” section from where you can change your survey effects.
Note: Survey Effects are available only for upgraded users.
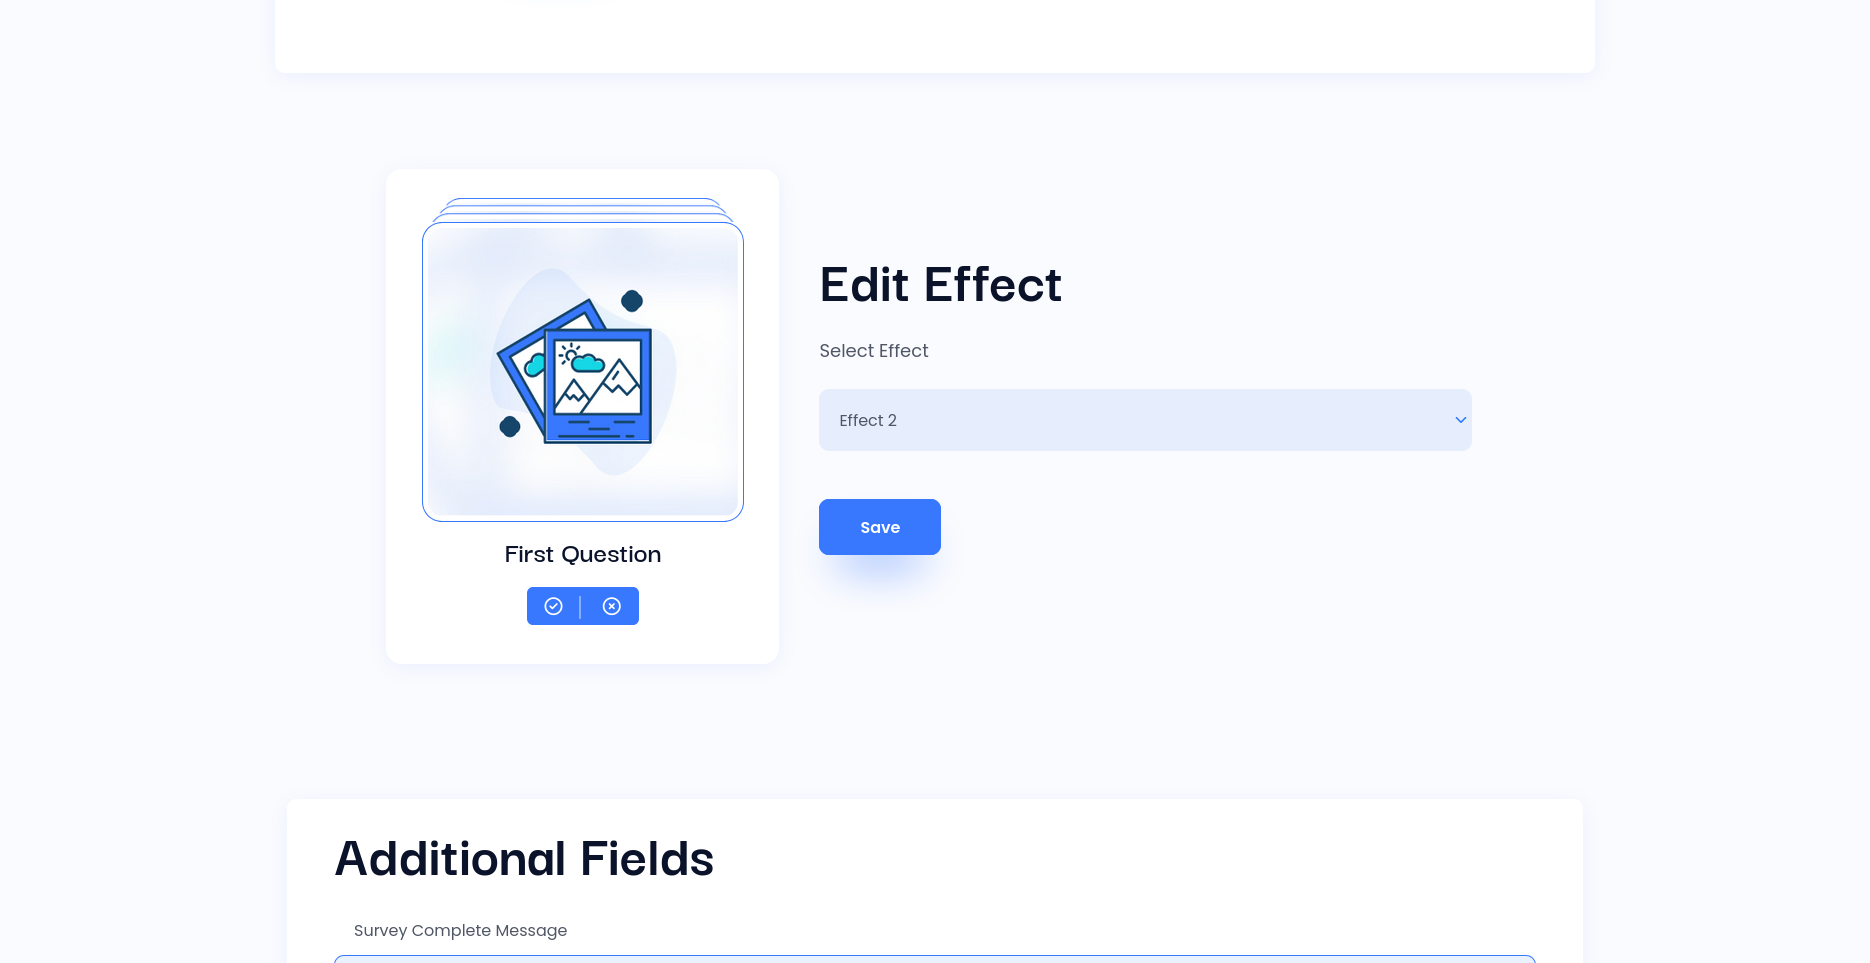
How to change Yes/No survey thank you message?
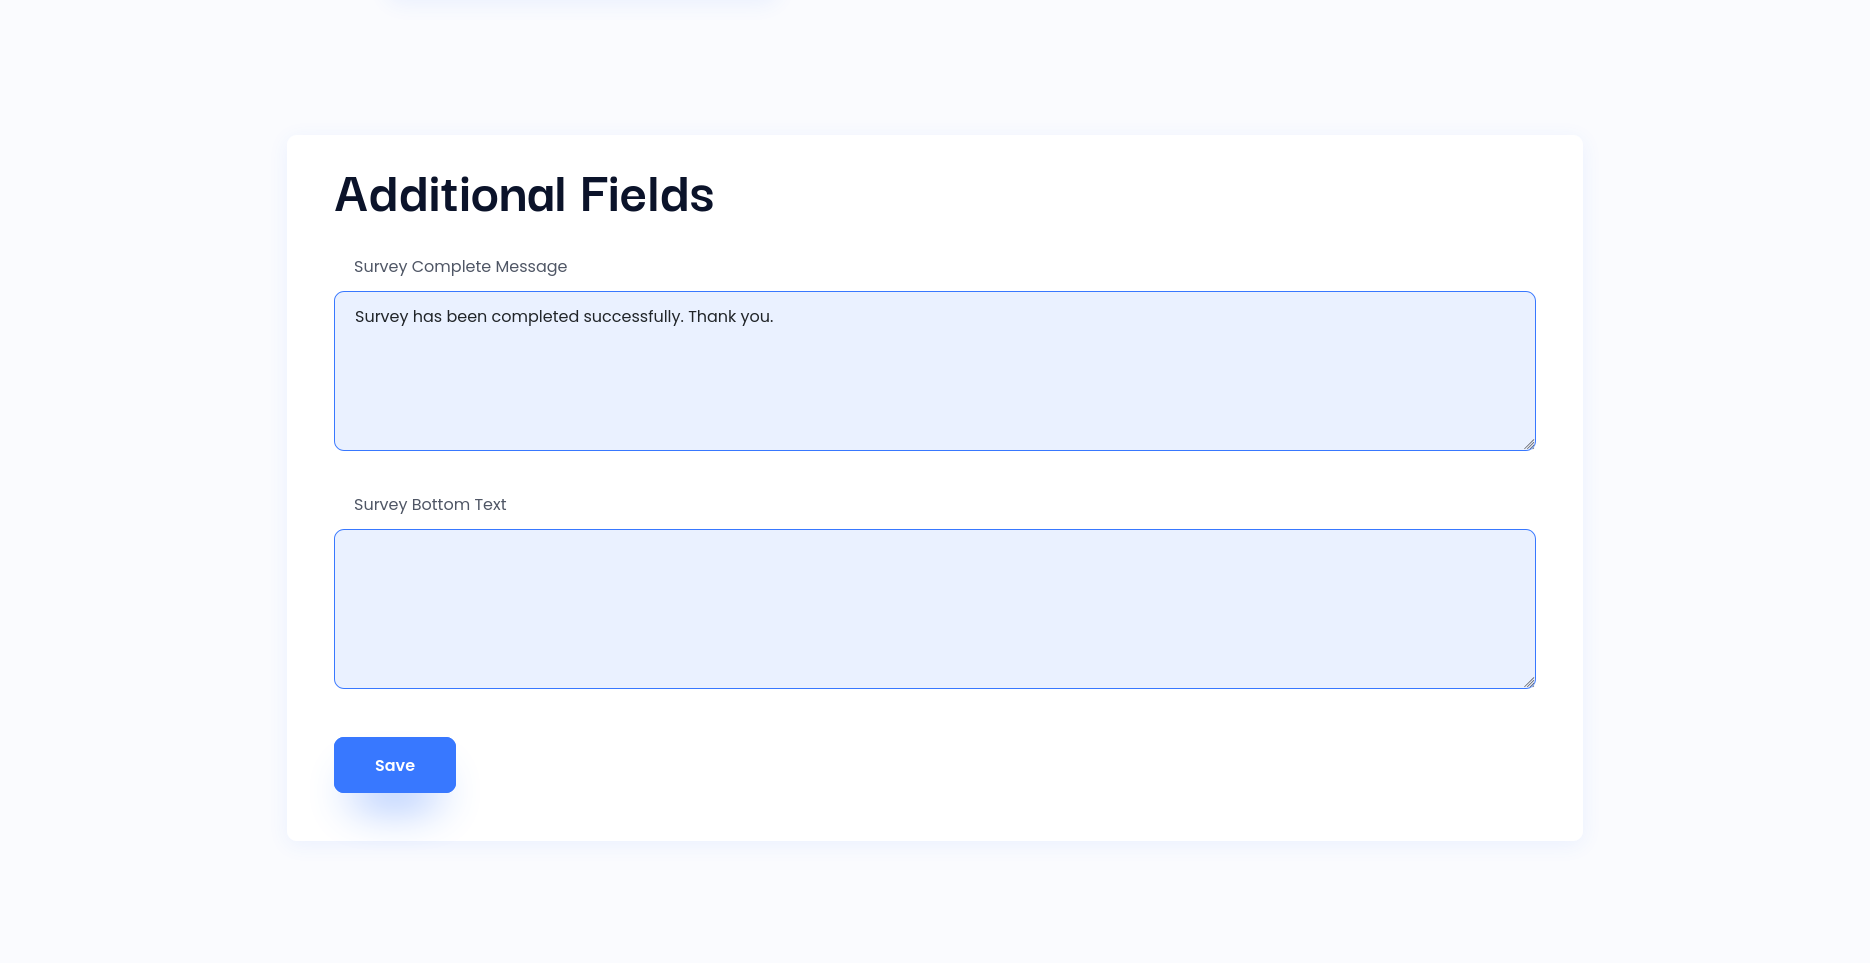
To change survey complete thank you message, edit survey and scroll down to bottom of the page. There is “Additional Field” from where you can change message.
How to add text at bottom of Yes/No survey?
To add custom text in footer in “Yes/No” survey, edit survey and scroll down to bottom of the page. There is “Additional Field” from where you can add or edit text.
Creating Advanced Form Builder
1. Create blank survey
– Navigate to “aAccount.”
– Enter the survey name you wish to create and click the “Create” button.
– Clicking the button will create the survey and add it to the list of surveys below.
– In the survey list, locate your survey and edit it.
2. When you create a survey, it is initially set to the “yes/no” survey type by default. To change the default survey type to “form,” navigate to the settings and save the changes. The “form” type is used for advanced form building.

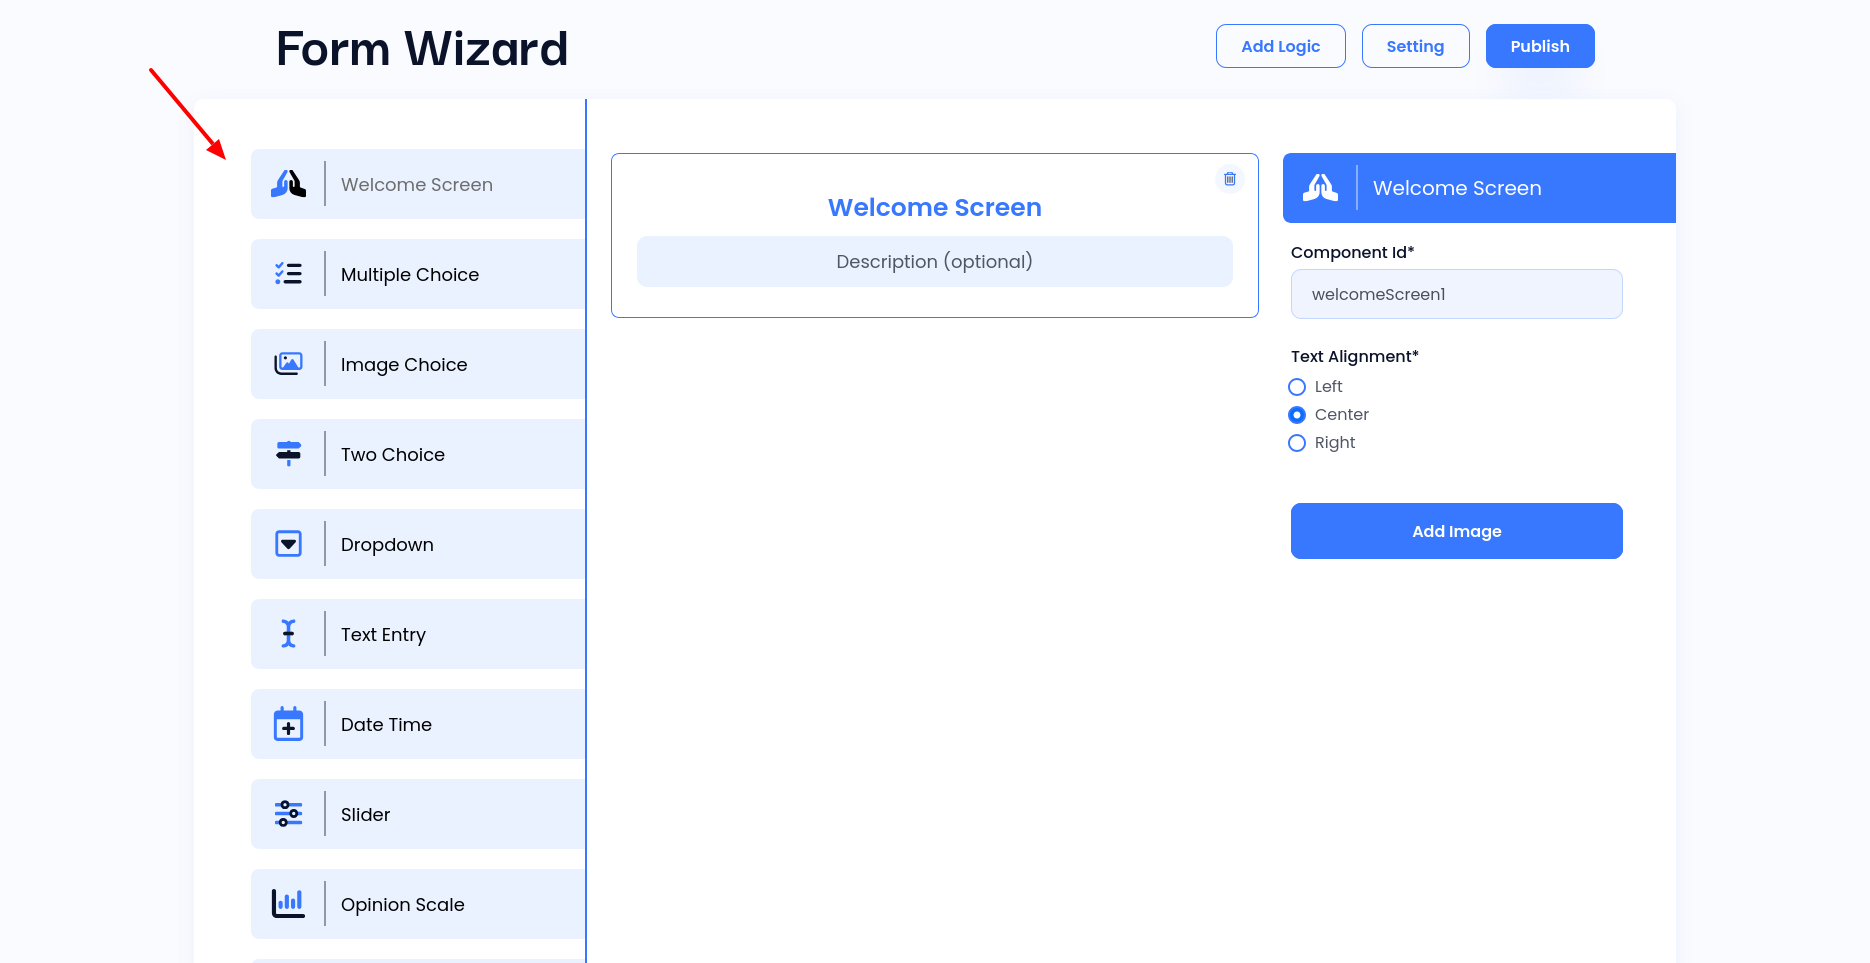
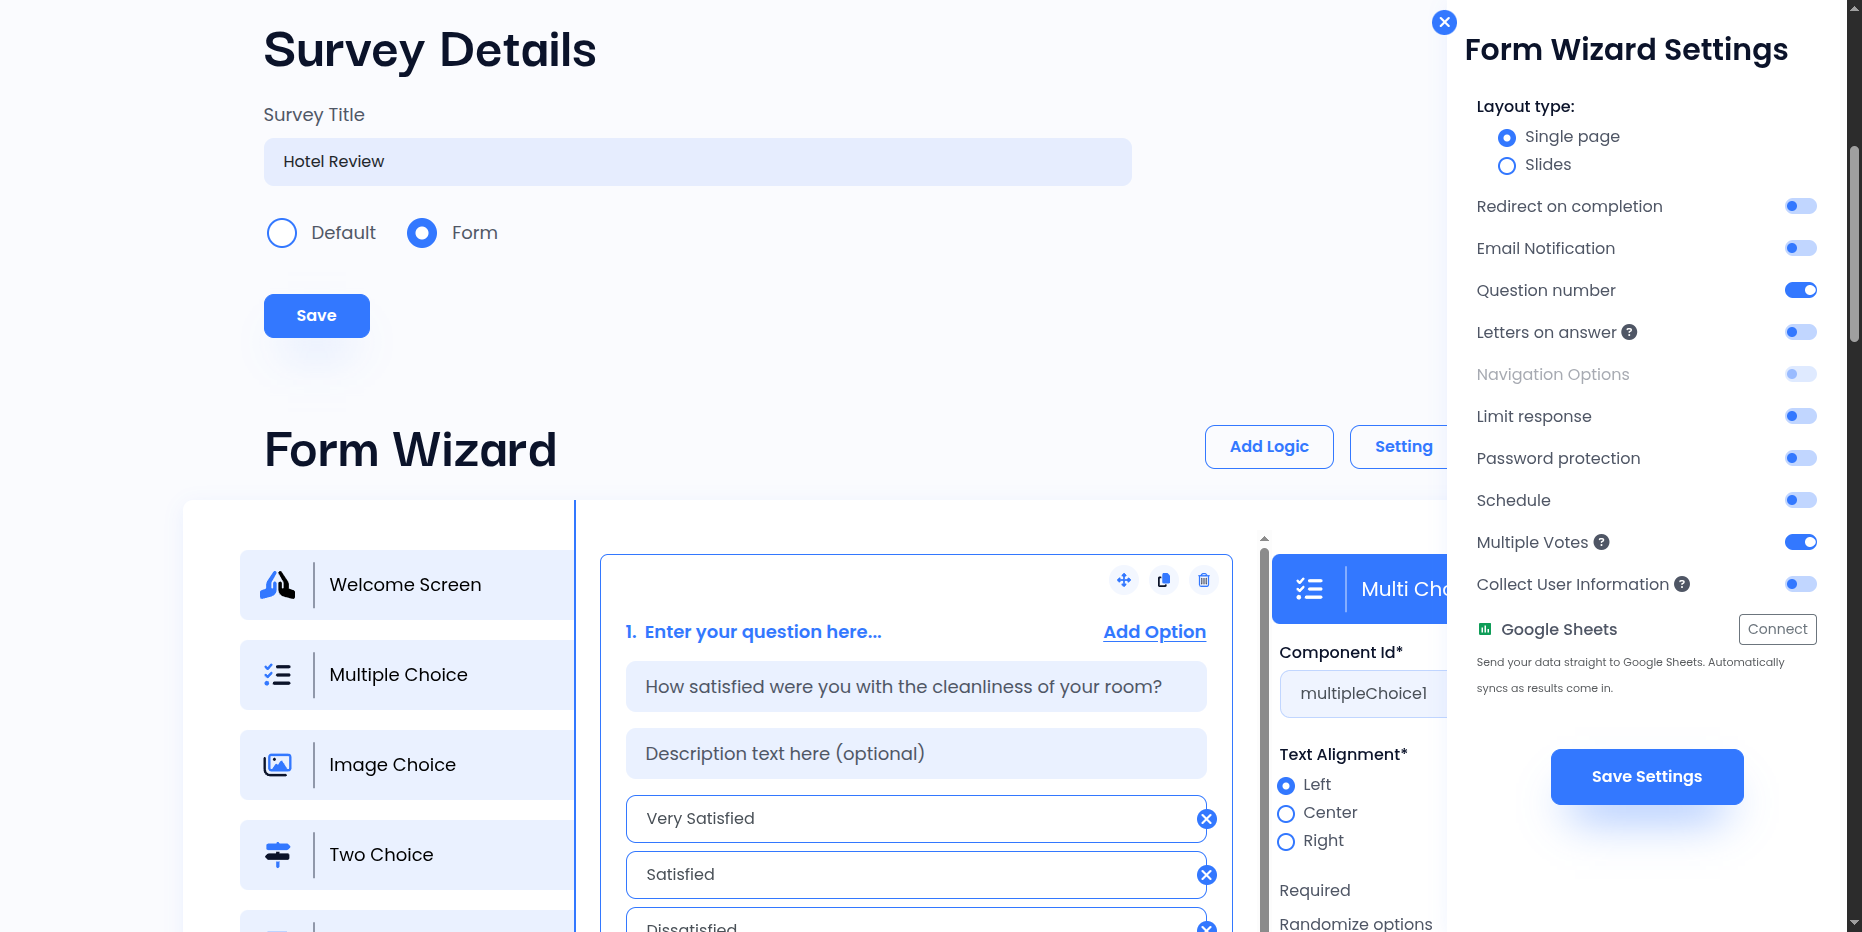
3. After changing the survey type to “form”. the advanced form builder section will become visible. In the Form Wizard section, you will see a list of different question types on the left panel.
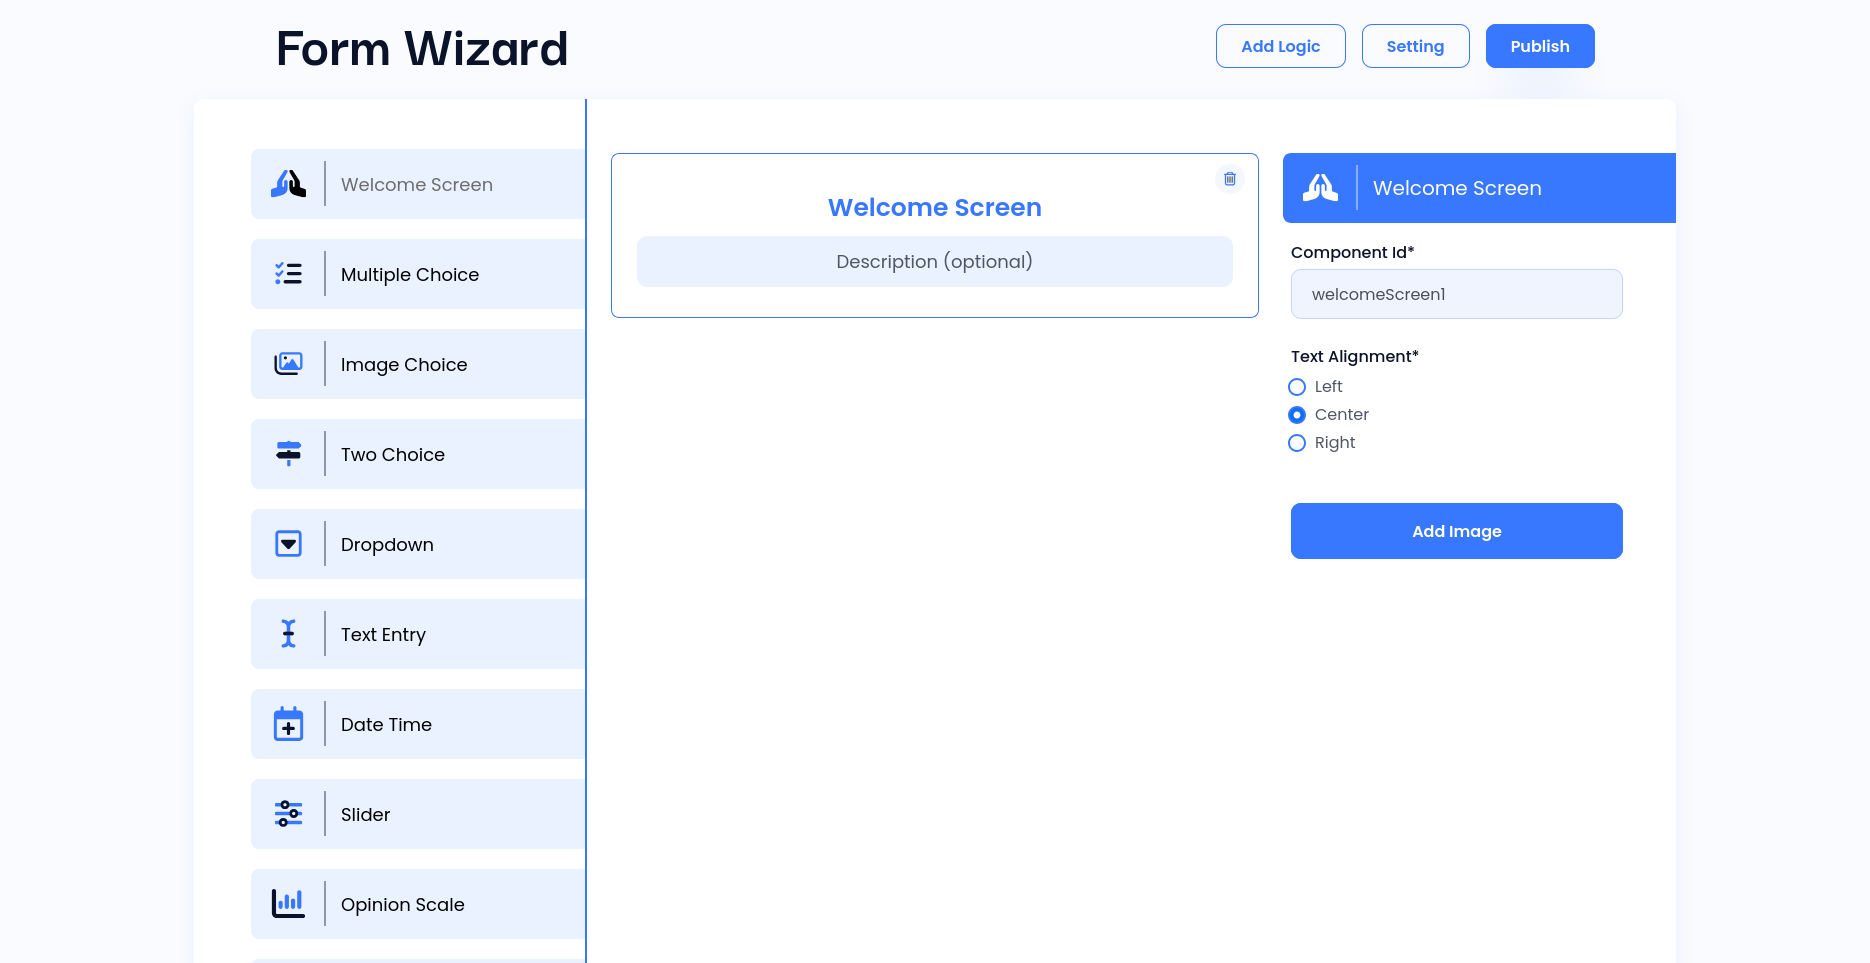
4. To add a question to the survey, click on the question type you wish to add. This will create a question in the center panel. In the center panel, you can manage your question by setting its name, description, options, and more.
5. You can also duplicate, delete, or reorder your questions by simply dragging and dropping them in the center question panel. Click and drag any question up or down to move it.
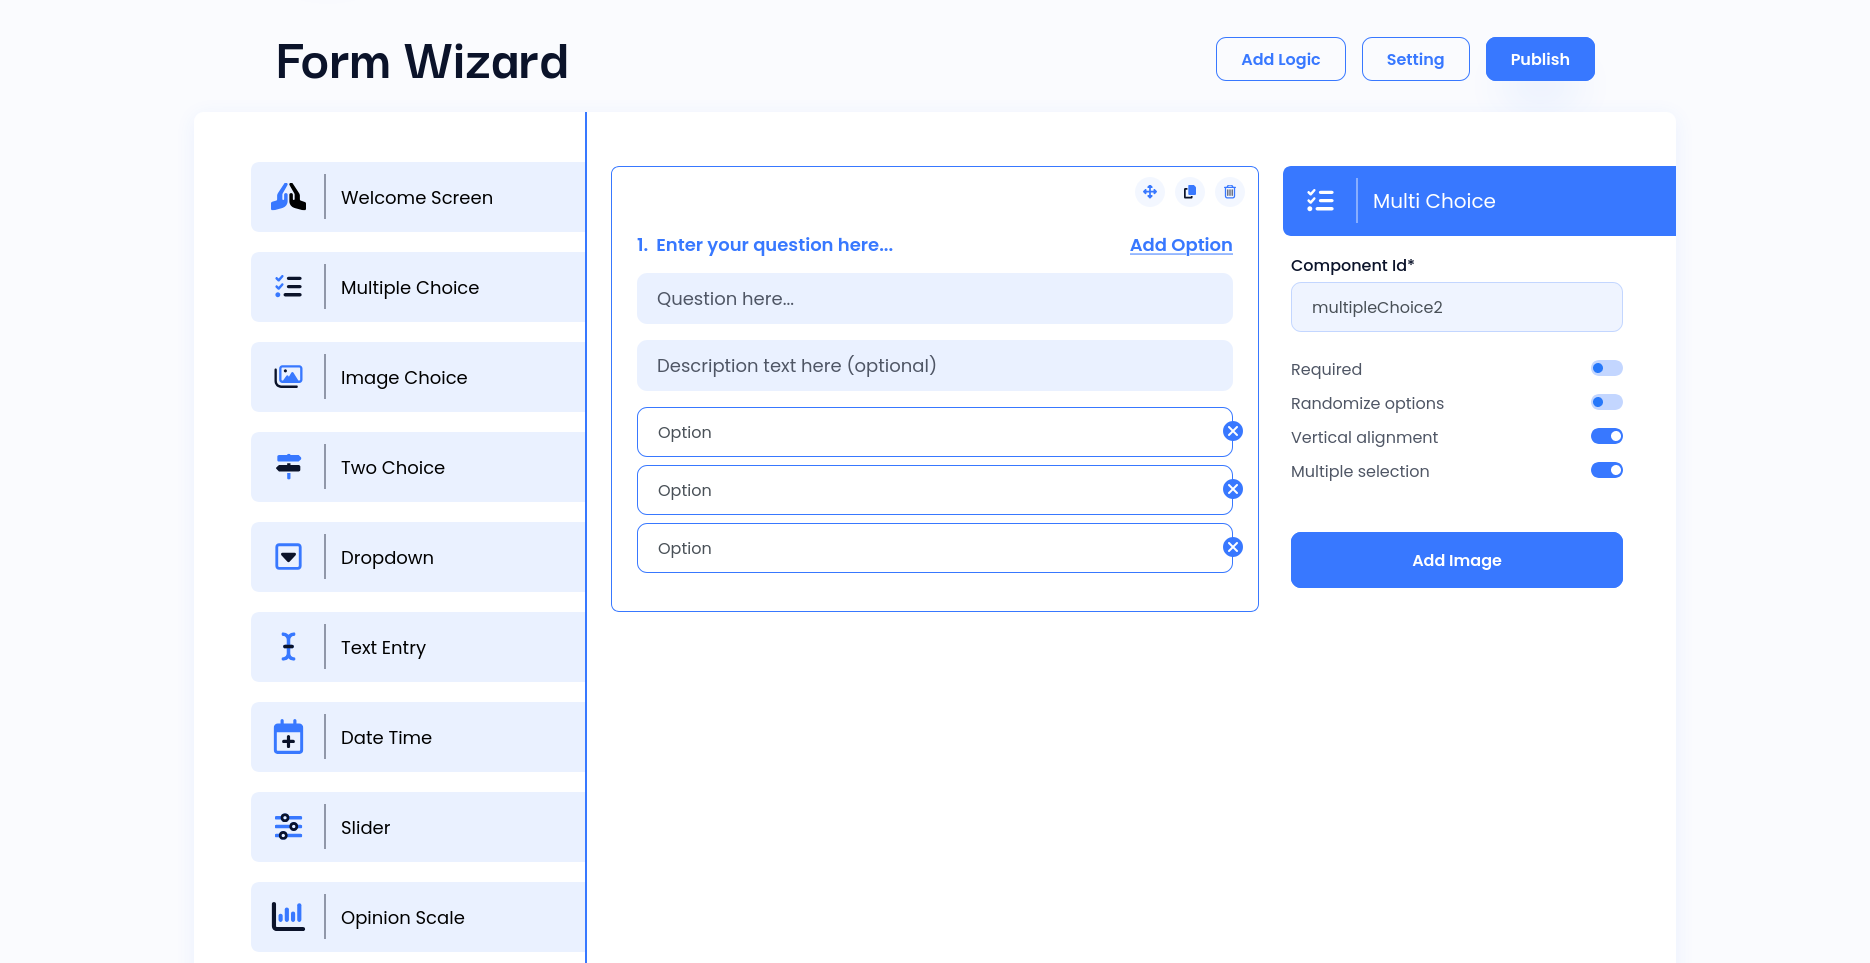
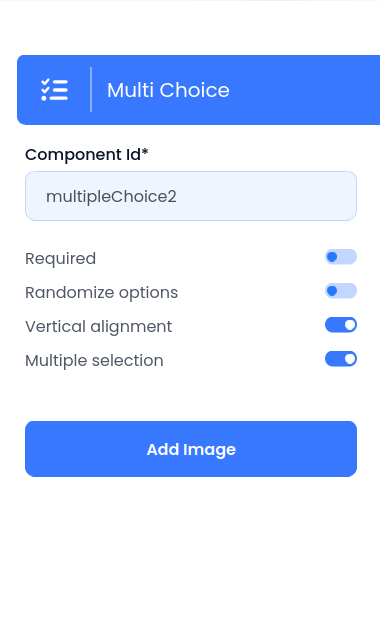
6. In the right panel, you can change question settings. Here, you can make the question required, enable multi-select, randomize options, and more. The settings vary based on the field.
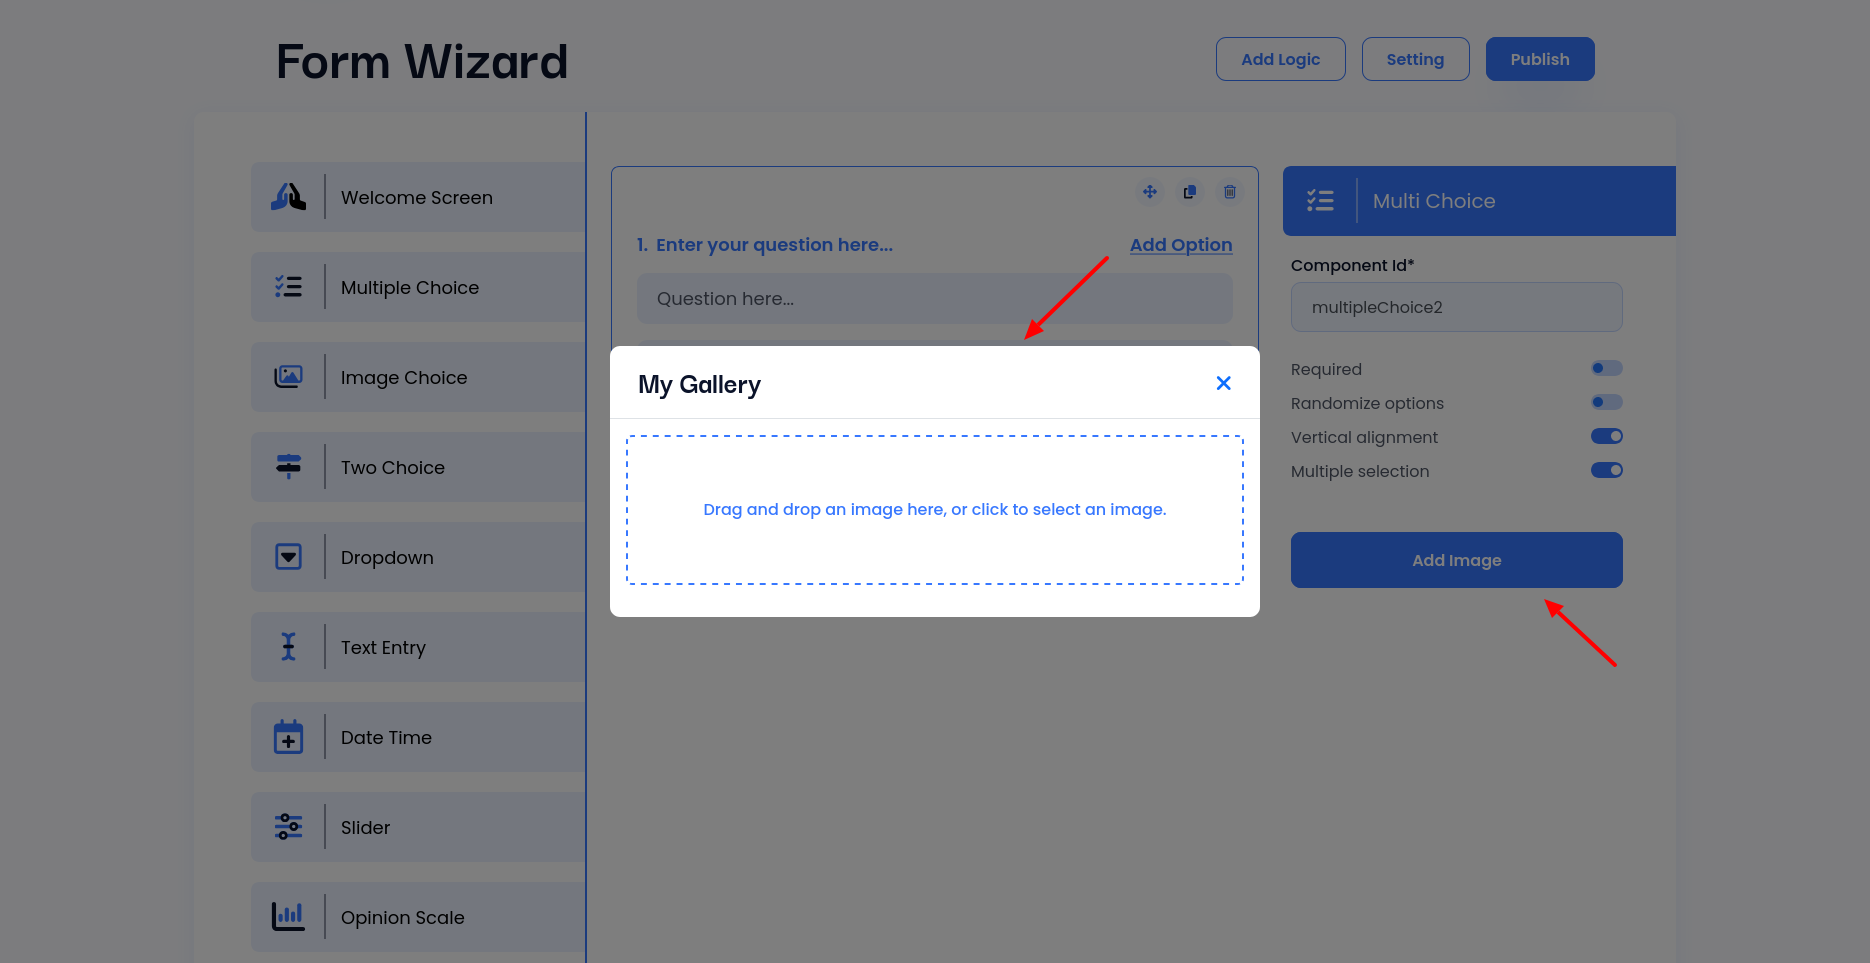
7. To add an image to the question, click the “Add image” button. This will open the image gallery from where you can add your own image, select, or delete an image.
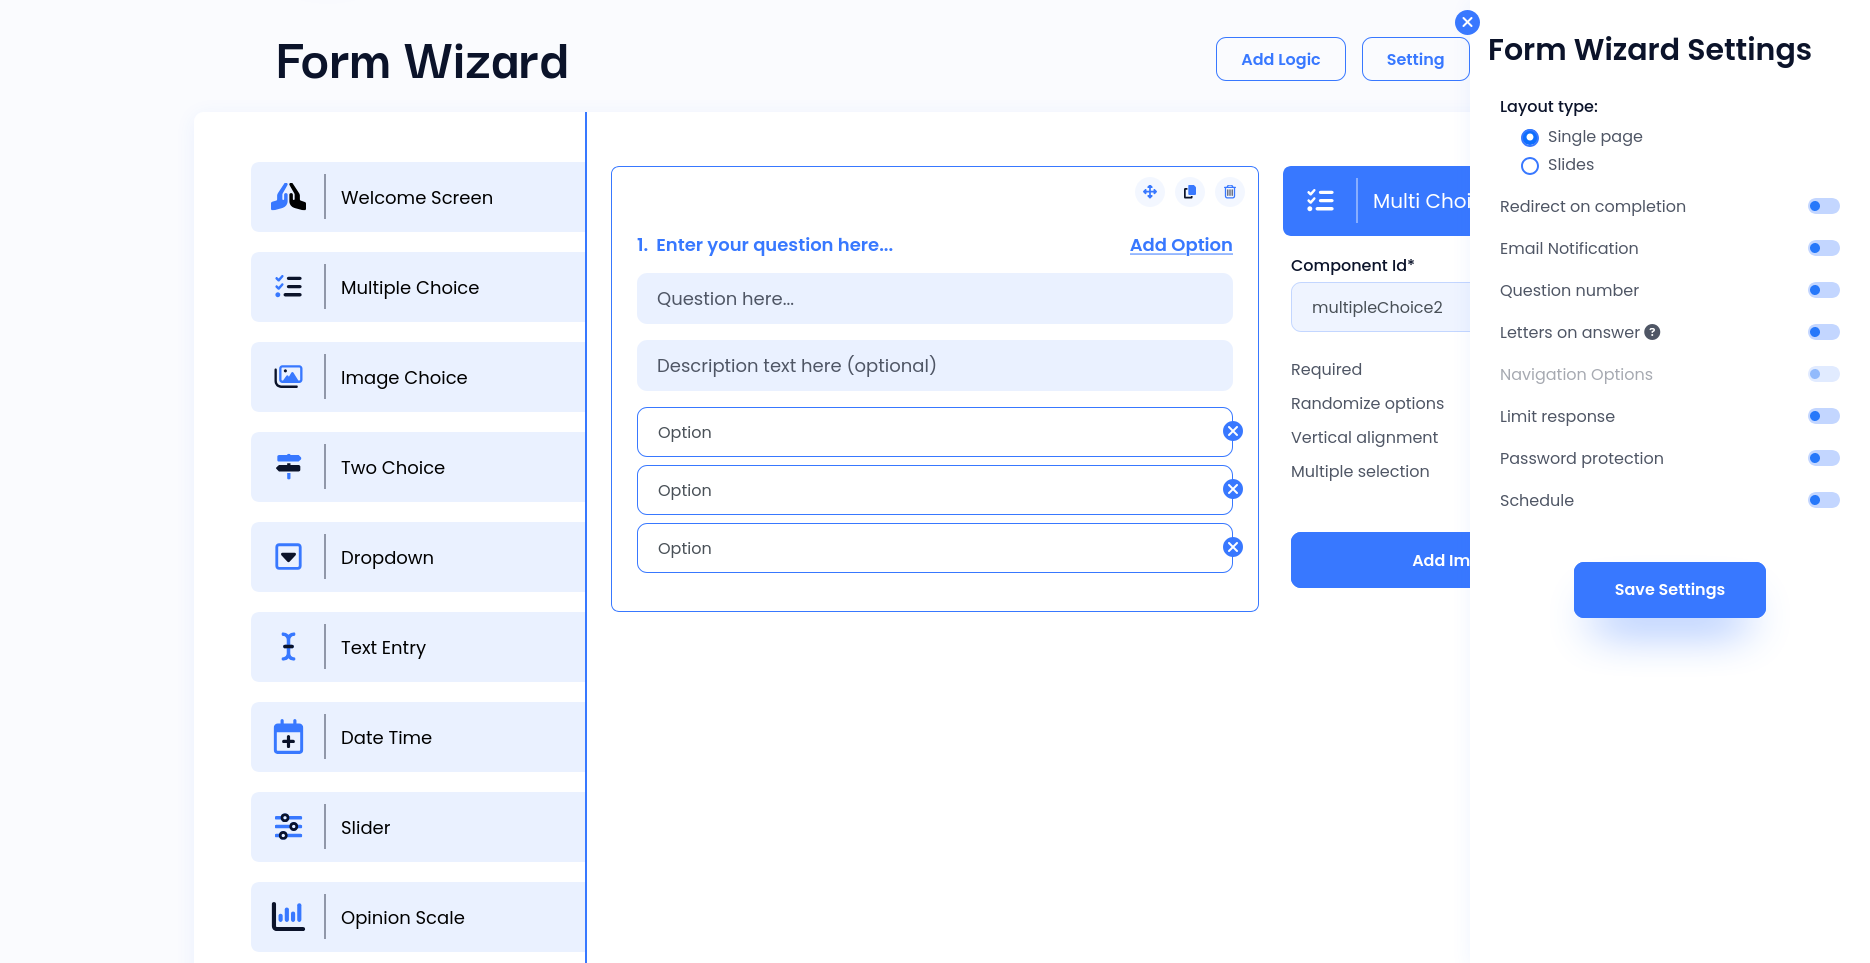
8. Click on the settings button to configure additional features in the advanced form survey. You can modify the form layout (single page or slides), set up redirection after completion, enable email notifications, set response limits, create schedules, apply password protection, and more.
9. Take advantage of logic features to display questions that are relevant based on previous responses. You can also link specific answers to different outcomes, allowing users to see varying conclusions based on their form responses.

10. Once your form is configured, click on the publish button to make it live. Then, simply copy the link and share it with others.
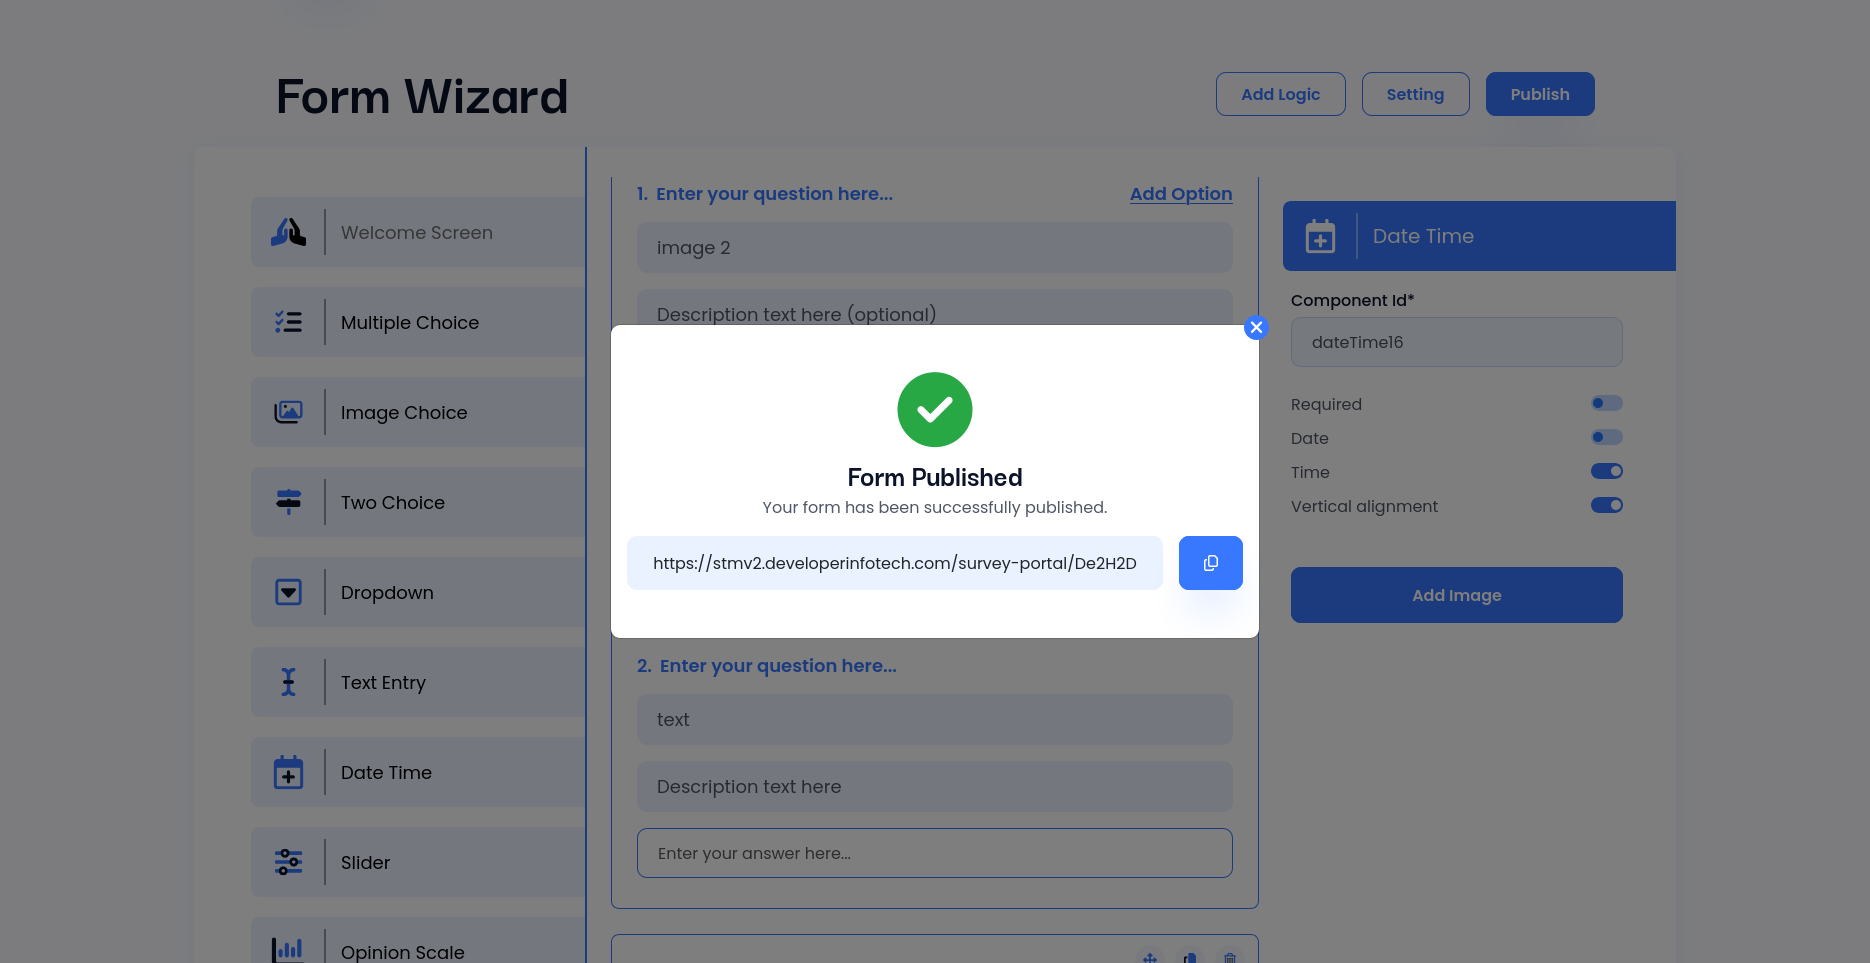
Image Position for Survey Questions
You can control how images are displayed in survey questions.
Features:
- 4 image positions available: Before, After, Left, Right
- Left and Right show image and content side-by-side
- Fully responsive for mobile devices
- Works with all question types including Welcome and Thank You screens
- Image position selector appears automatically when image is added
- Selected position is saved automatically with the question
Poll Builder for Surveys
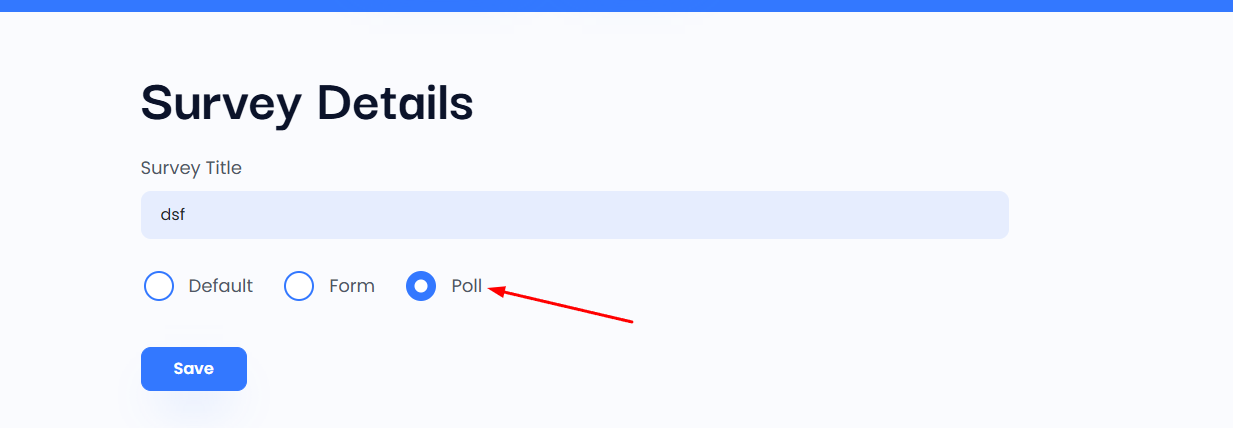
1. When creating a new survey, the default type is set to “Yes/No.”
To use the Poll system, go to Settings, change the survey type to “Poll,” and save your changes.
Once selected, the Poll type enables access to the Advanced Poll Builder, which is designed for creating interactive and customizable polls.
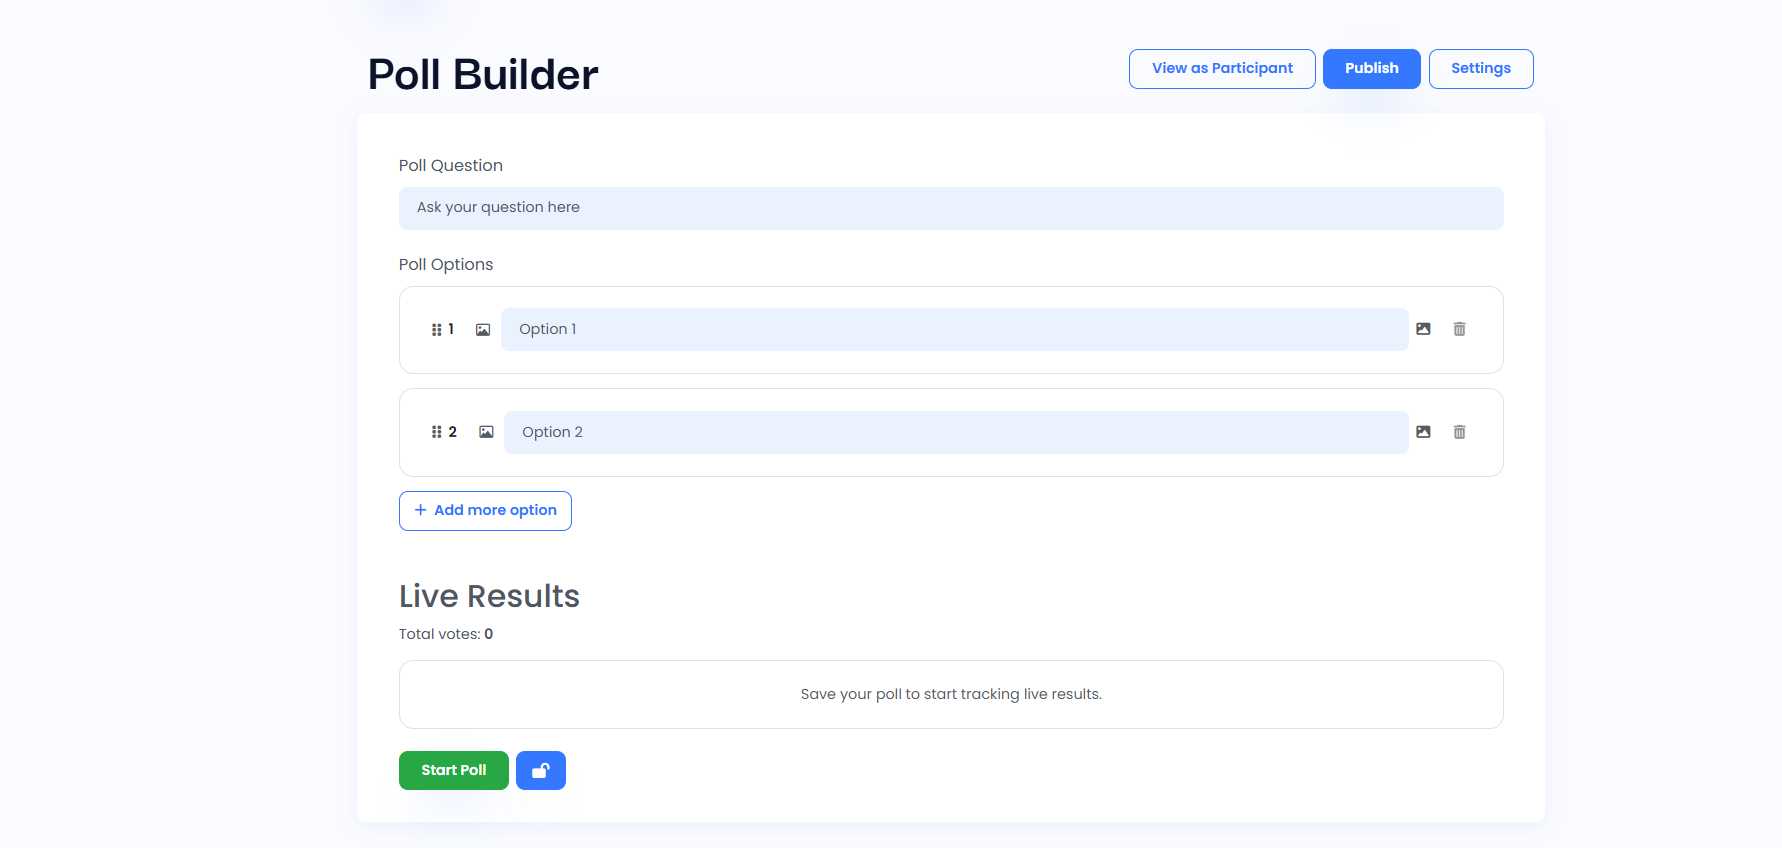
2. Using the Advanced Poll Builder
After switching to the Poll type, the Advanced Poll Builder section will appear.
In this section, you can:
- Enter your poll question
- Add multiple answer options dynamically
- Edit or remove options at any time
The Live Results panel displays:
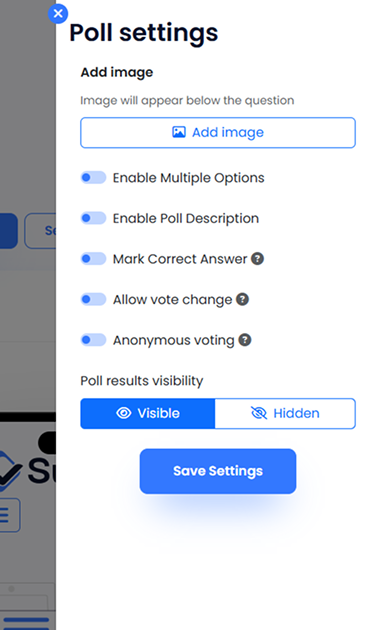
3. Poll Customization & Settings
You can enhance your poll using the available settings:
- Add images to the question or options
- Enable multiple selection
- Add an optional description
- Mark a correct answer
- Enable anonymous voting
- Control result visibility (visible or hidden)
All changes can be applied instantly by clicking the Save Settings button.
4.The ‘View as Participant’ button in Live Preview shows exactly how your poll will appear to participants on a mobile device before you publish it.

Google Sheets Integration
Survey responses are automatically synchronized with a connected Google Spreadsheet after every submission. This ensures real-time data availability in Google Sheets without any manual export.
The integration is designed to support both Form Survey and Default Survey independently, allowing each survey to maintain its own data structure and spreadsheet connection.
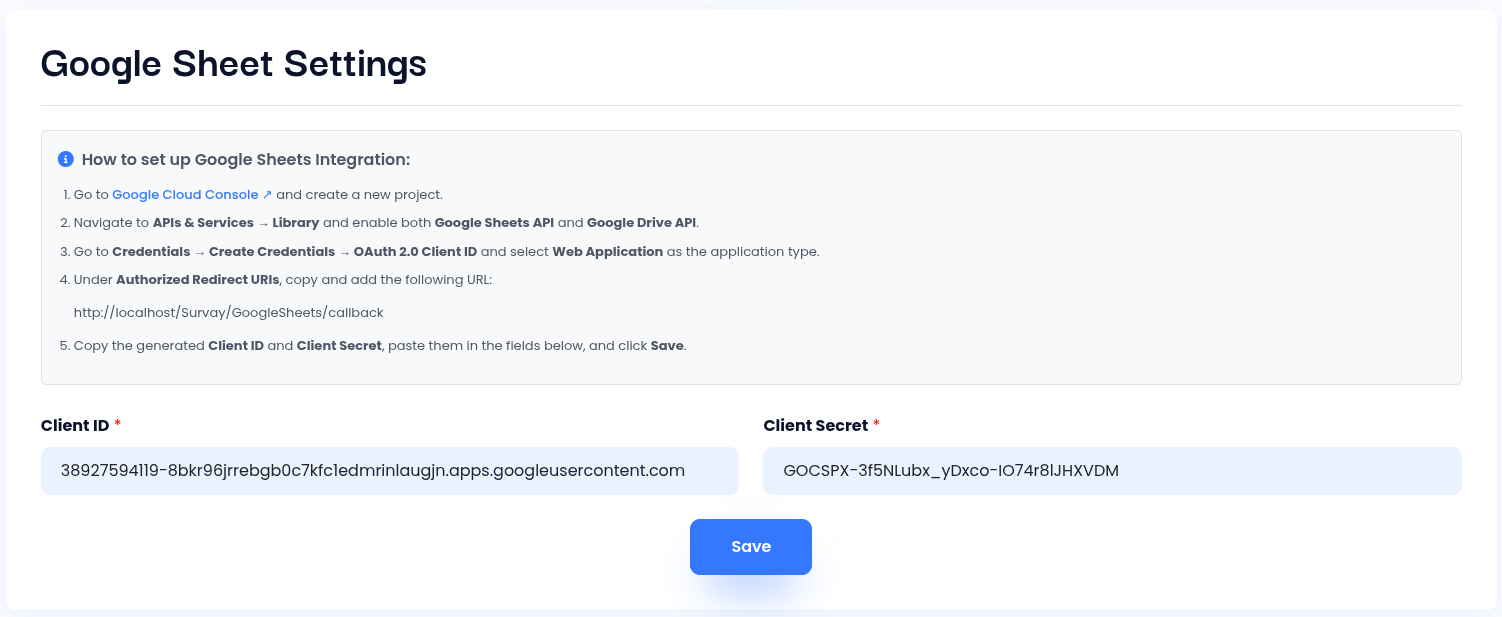
Step 1: Open the Admin Panel → Settings , enter your Google OAuth details (Client ID and Client Secret) in the Google Sheets settings section, and click Save to activate the integration.
Step 2: Connect Google Sheet
Go to My Account → Edit Survey → Settings → Google Sheets section, click the Connect Button, then a Google login window will open where you sign in and complete authentication, after successful login the Google account will be connected to the survey.
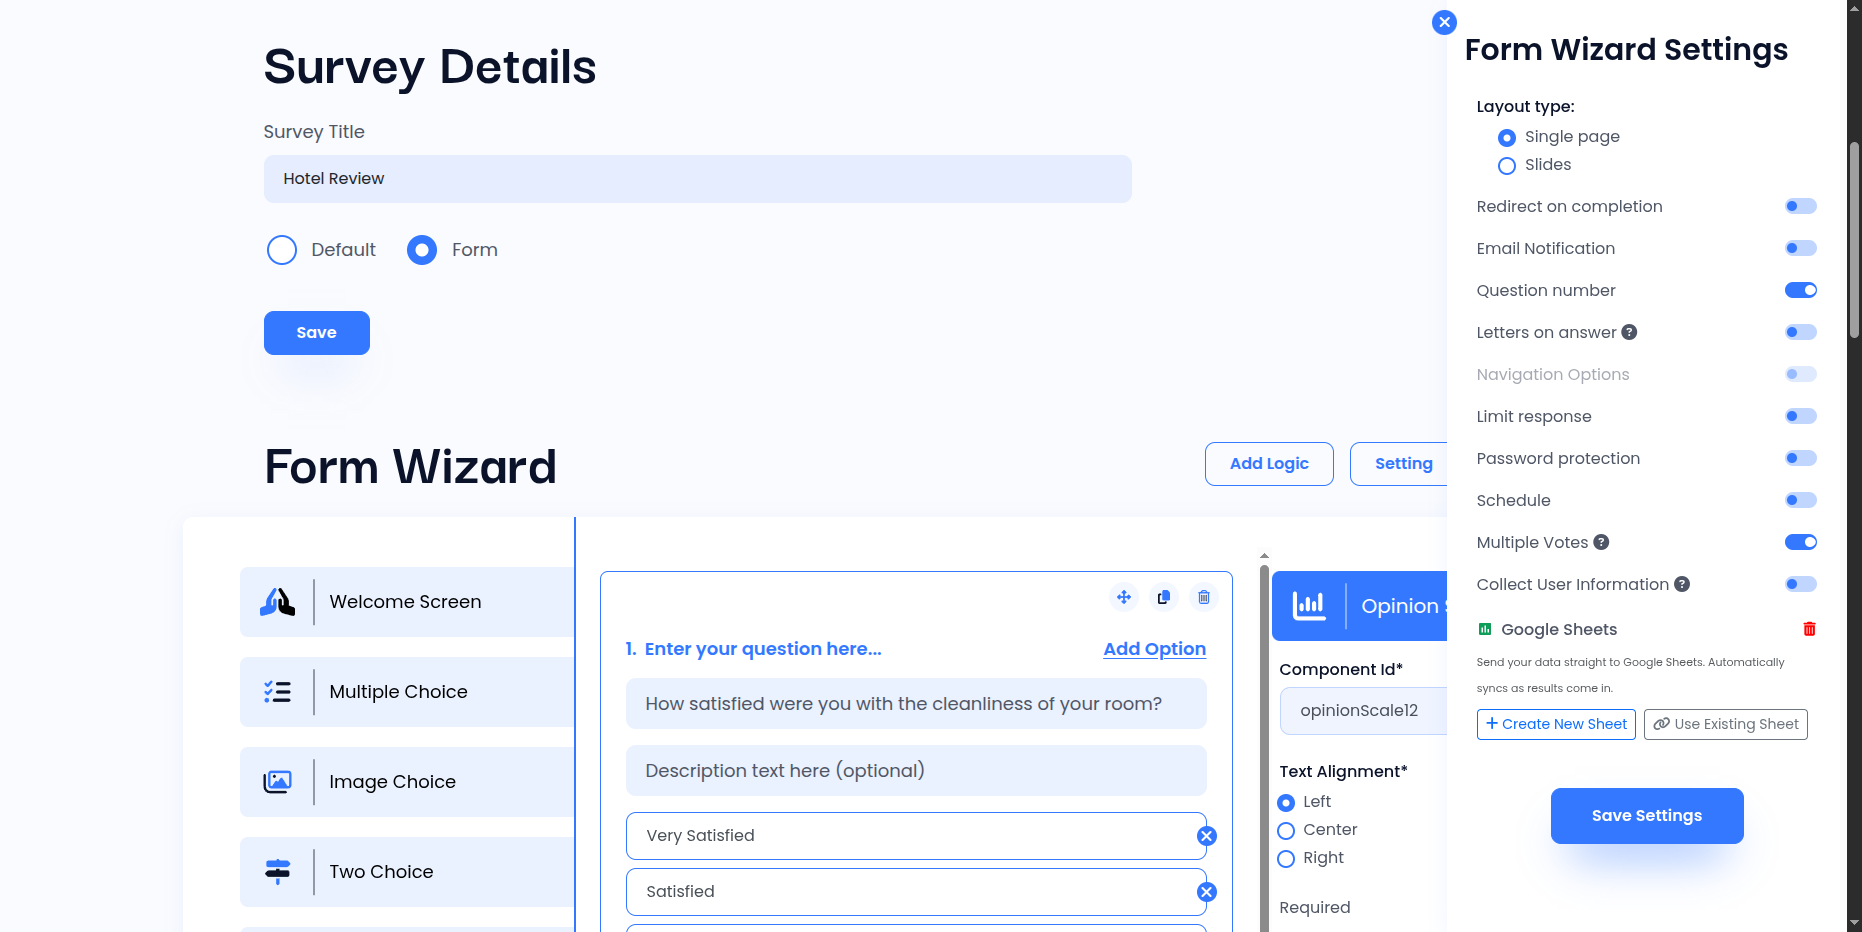
Step 3: Sheet Setup & Sync Enable
After successful Google connection → choose Create New Google Sheet or Use Existing Google Sheet → click Create / Connect to link the sheet → once connected, sync will be enabled by default (ON state) → click Save Settings to apply the changes.
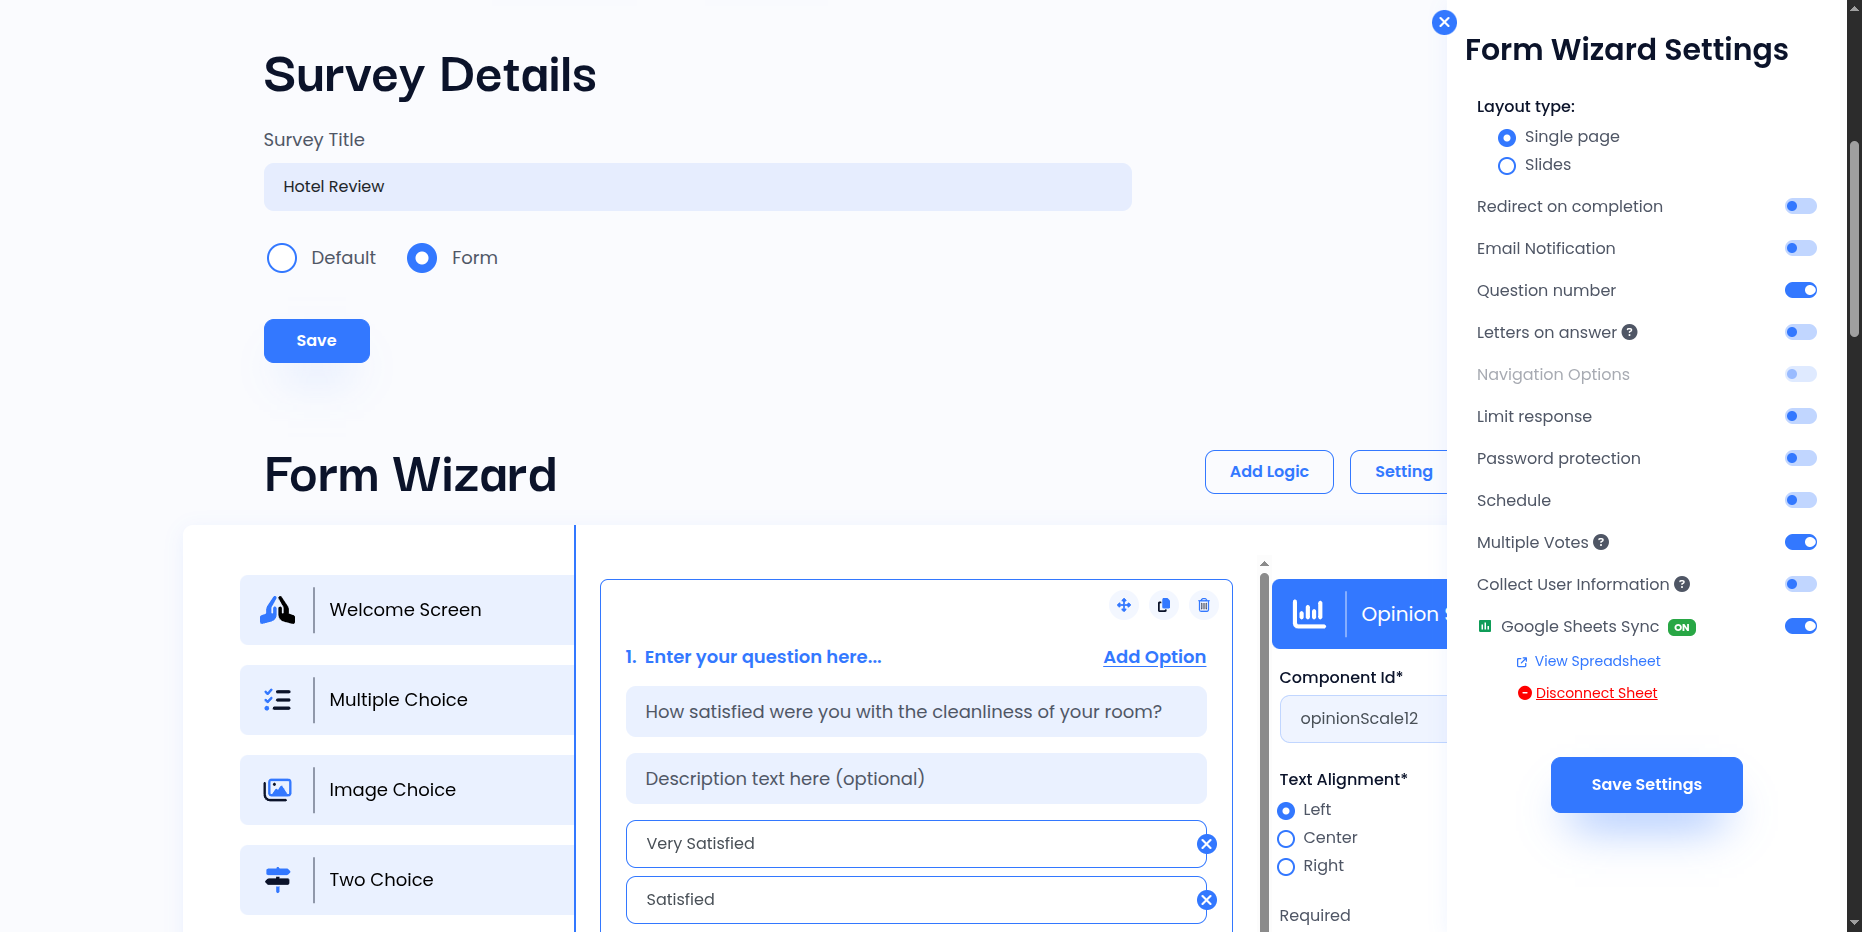
Step 4: Manage Sheet & Disconnect
After successful connection → Google Sheet is enabled by default (ON state) → you can enable/disable sync anytime using the toggle (ON/OFF) → click Save Settings to apply the changes.→ click View Spreadsheet to open and view the connected Google Sheet → click Disconnect Sheet to remove the sheet connection and unlink the Google account completely.
Embedding Forms
Share via Link: Anyone with the link can access the survey unless additional restrictions (such as password protection or response limits) are set in the survey settings.
Embed via Iframe: If you prefer embedding the survey on a website or platform, the Iframe Embed option provides HTML code to integrate your survey directly into another webpage.
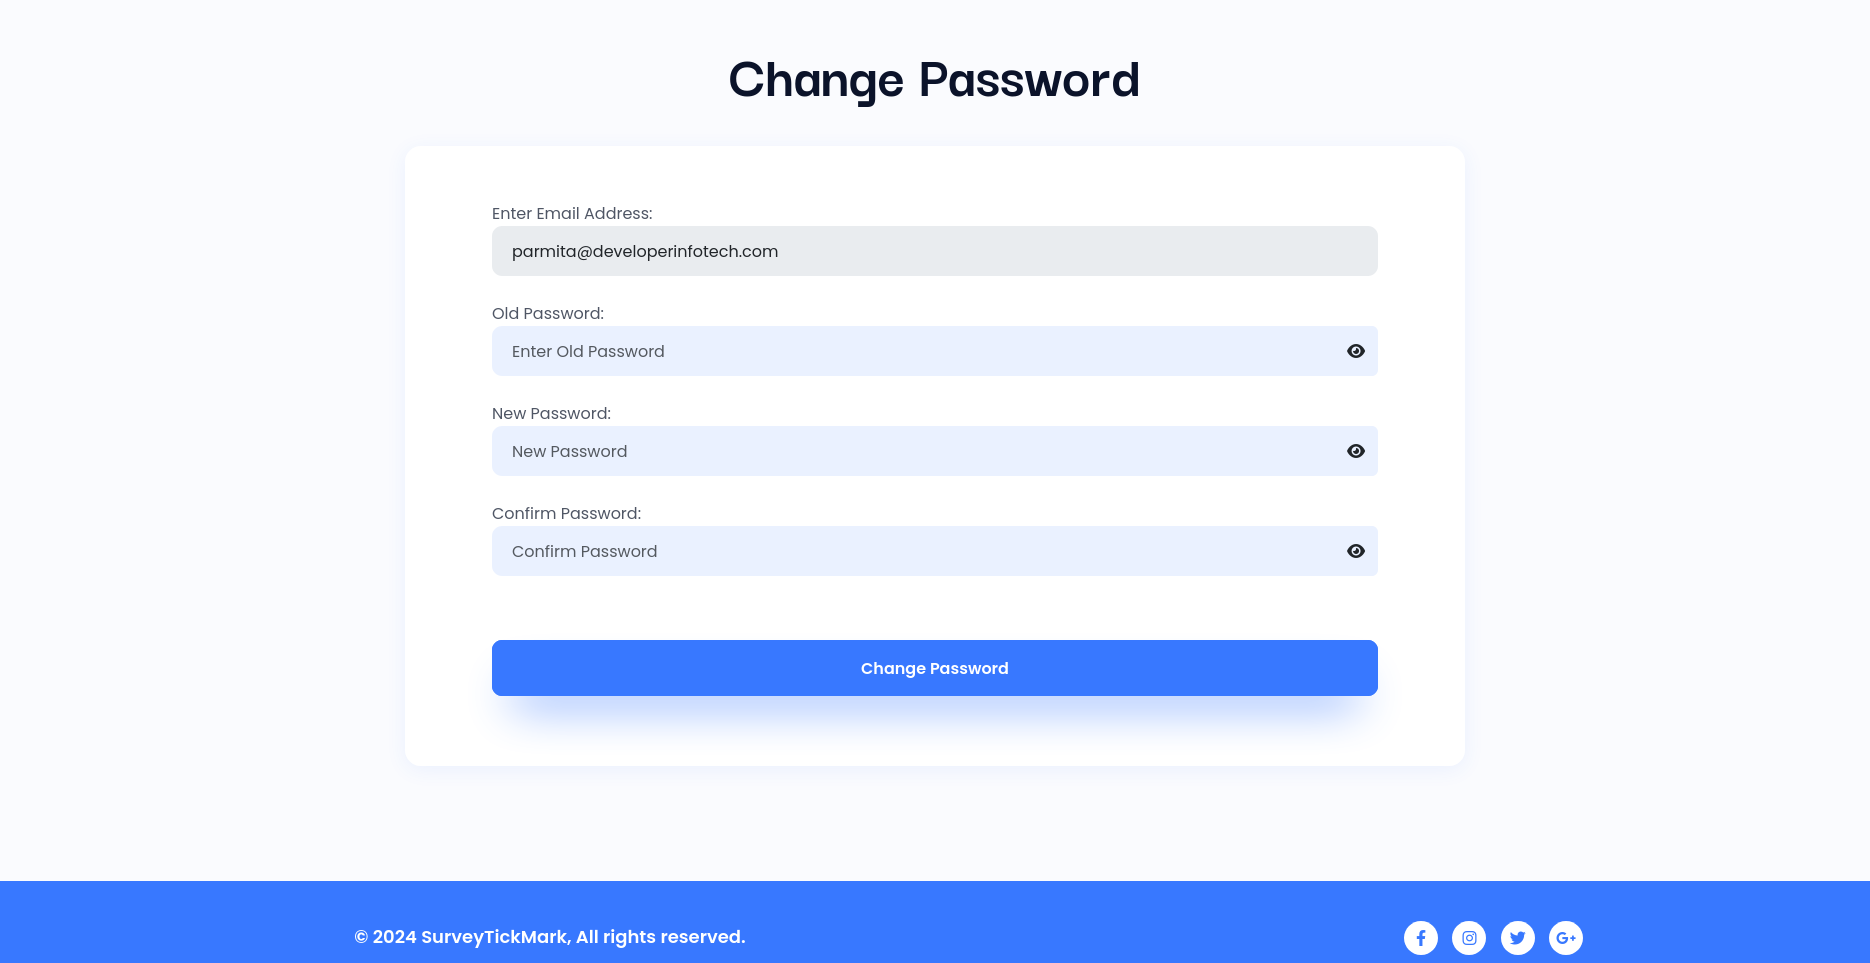
Change Password
Go to “My Account”, scroll down to bottom of page. Their is change password section available. Add strong password for security and save it.